Tutorials
Use 3D assets in 


Use Lottie animations in 
Smart Tools
AI 3D Generator
Turn your ideas into custom 3D assets instantly
glTF 3D Editor
Edit and create stunning 3D illustrations in no time
File Converter
Convert your graphic assets into various format easily
AI Background Remover
Effortlessly remove backgrounds from any image—quick, easy and free
Illustration Kit Editor
Try our Illustration Kit Editor to experience endless design possibilities
IconScout API
Integrate highly-customizable design assets within your platform
How To Model a 3D Human In Blender
We are here with another tutorial, and this time it is Modeling a 3D Human in Blender. We hope you are as excited as we are to share it with you!
Iconscout is back with a new tutorial from our 3D Journey Series. Today we will help you create humans in 3D with this easy tutorial. If you are new here or missed our previous blog from our 3D Journey Series, do not forget to click below and start your 3D Designing Journey with Iconscout!

So let's get right into the action with this detailed step-by-step procedure, and by the end of it, you'll be a pro at designing 3D humans!
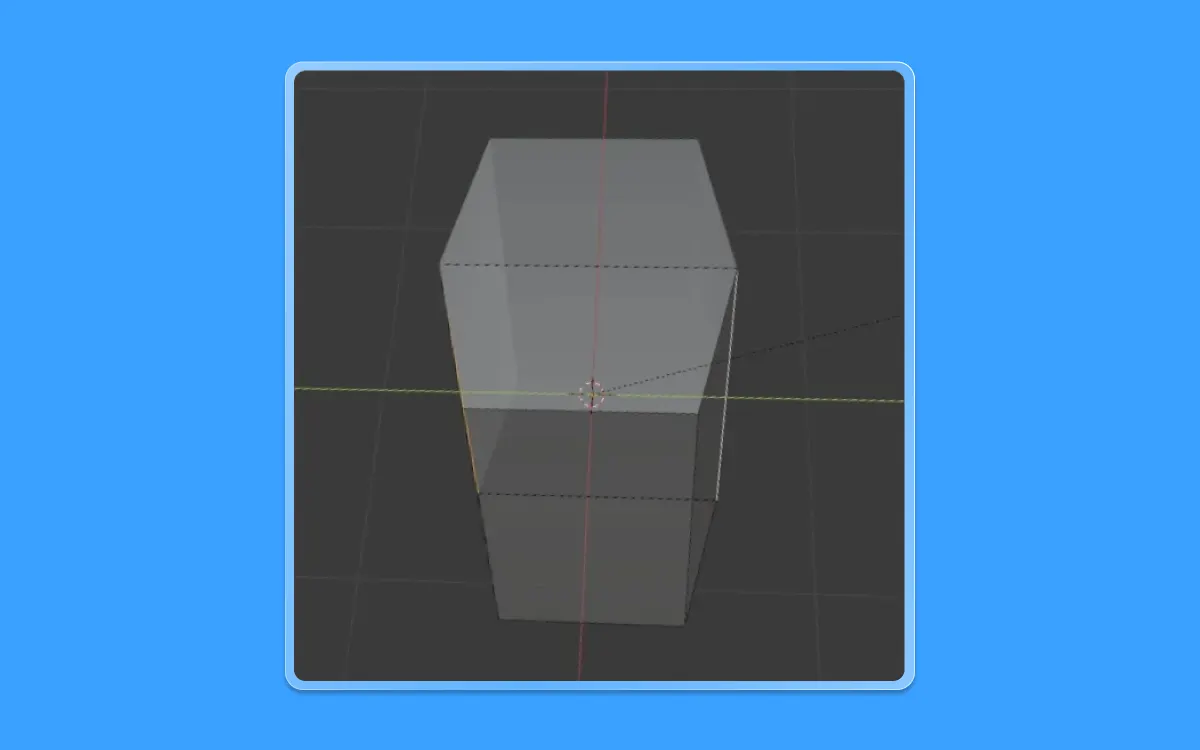
Run Blender for the first time, and you will be welcomed with this user interface as your default screen. Your 3D Space, know as the Viewport is your playground to explore and learn. Do not hesitate to play with it. The default object in Blender is this cube that you view on the screen. This is the building block with which you will create your 3D human. So get your tools ready, and let's begin!
Step 1: Setting Up Your Board
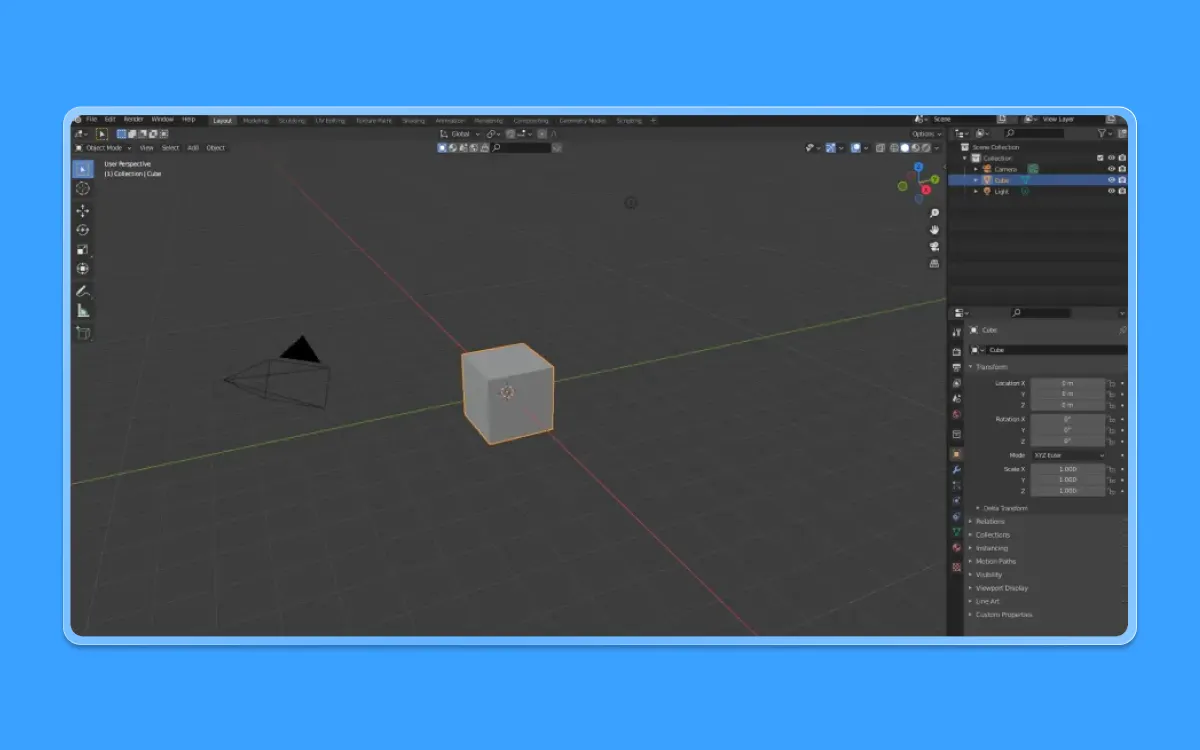
- Open Blender.exe on your PC/Mac
- The default scene will appear before you
- Keep the default cube you can see on your screen. We will be using it as our base geometry mesh
- Press 1 in your number pad so that we can access the side view
- Select the cube by pressing the left click on the mouse
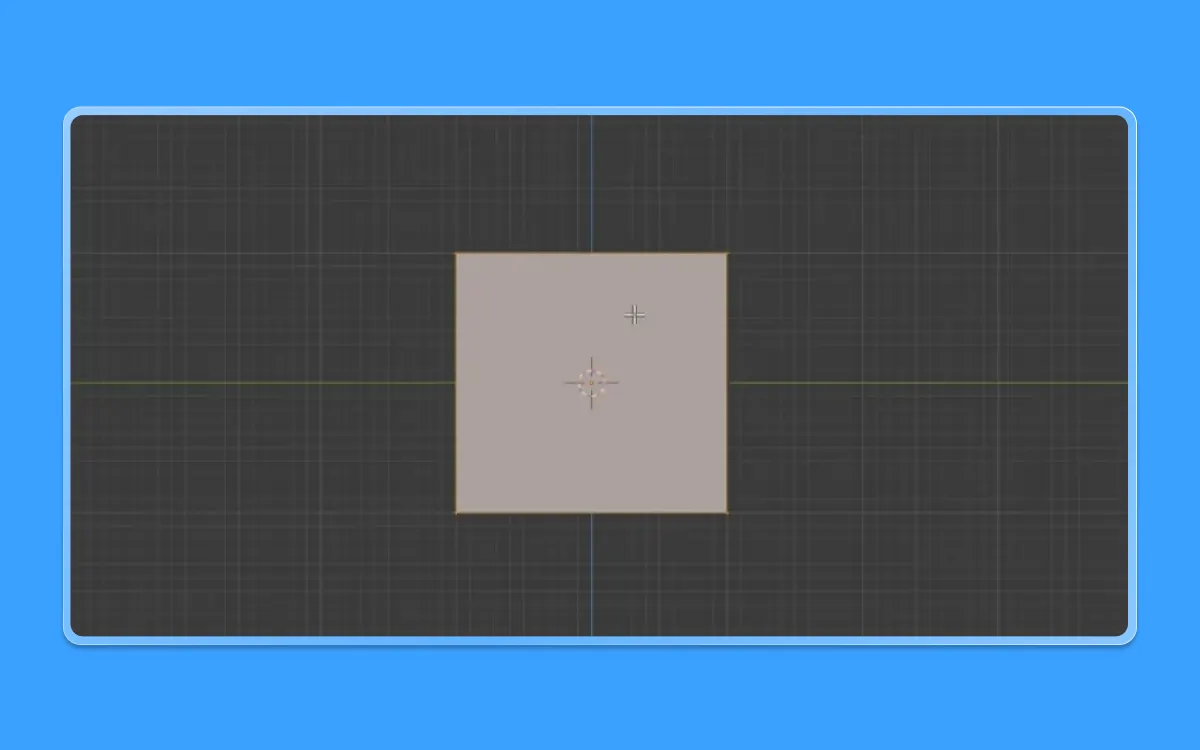
Step 2: The Cube
- Now let us divide the cube into two by adding a loop in the middle
- Press Ctrl+R after selecting the cube

- You will get an incision highlighted in yellow
- Press left click once again to confirm the addition of the loop
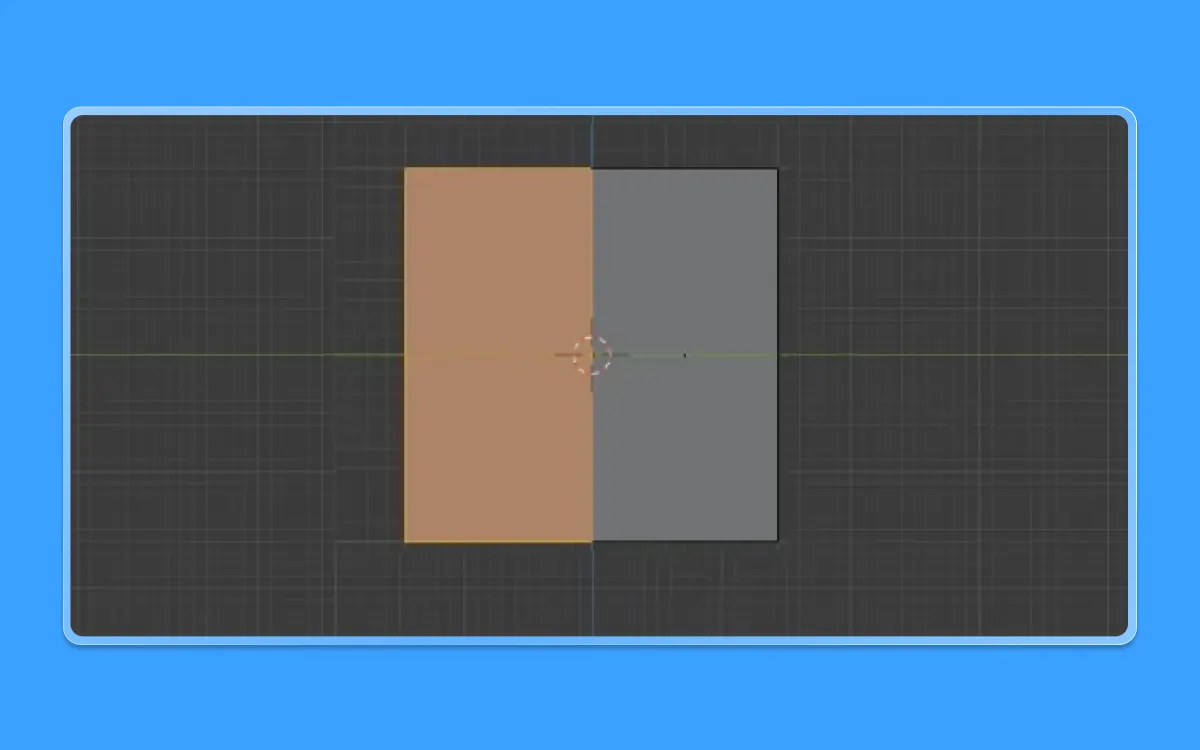
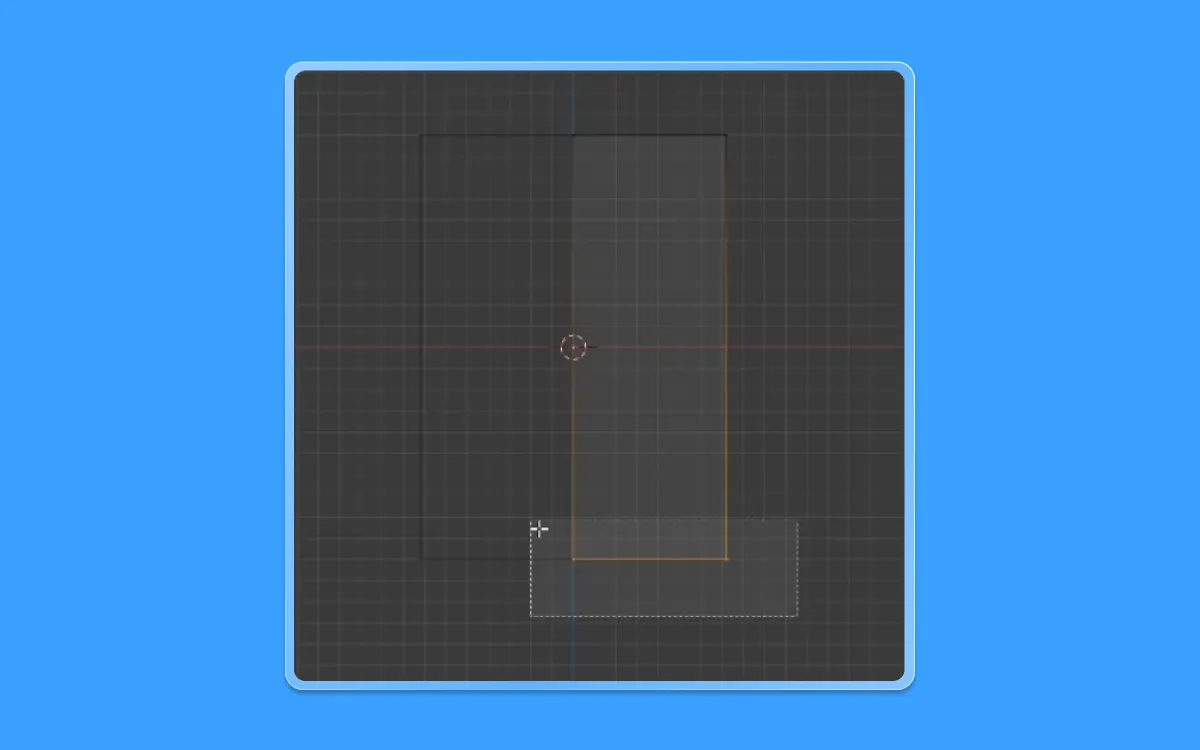
- Press Alt+Z so that you enter the X-ray mode. This mode will help you to select the Mesh as well
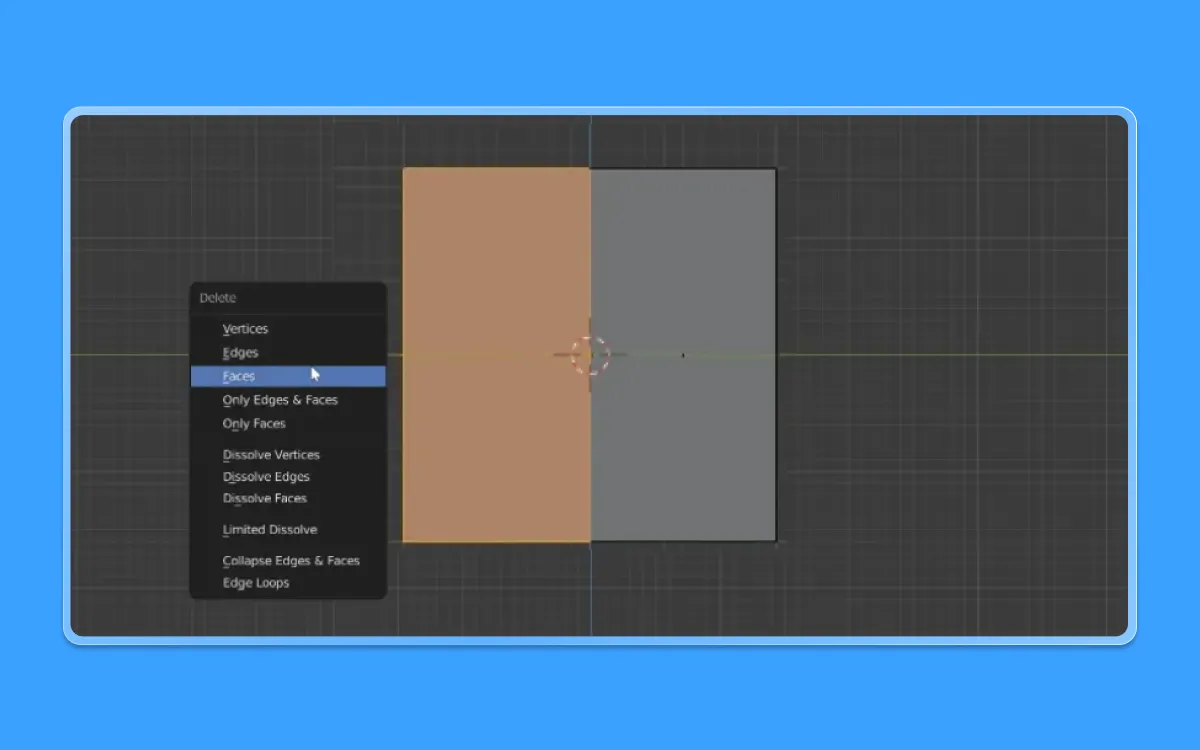
- Now that you have X-Ray mode turned on, select the left half of the cube by dragging and selecting the left click of your mouse
- Press X to delete that face.
- You will get a pop-up menu to select to delete an edge, vertex, or face.
- Press the 'Faces' option.
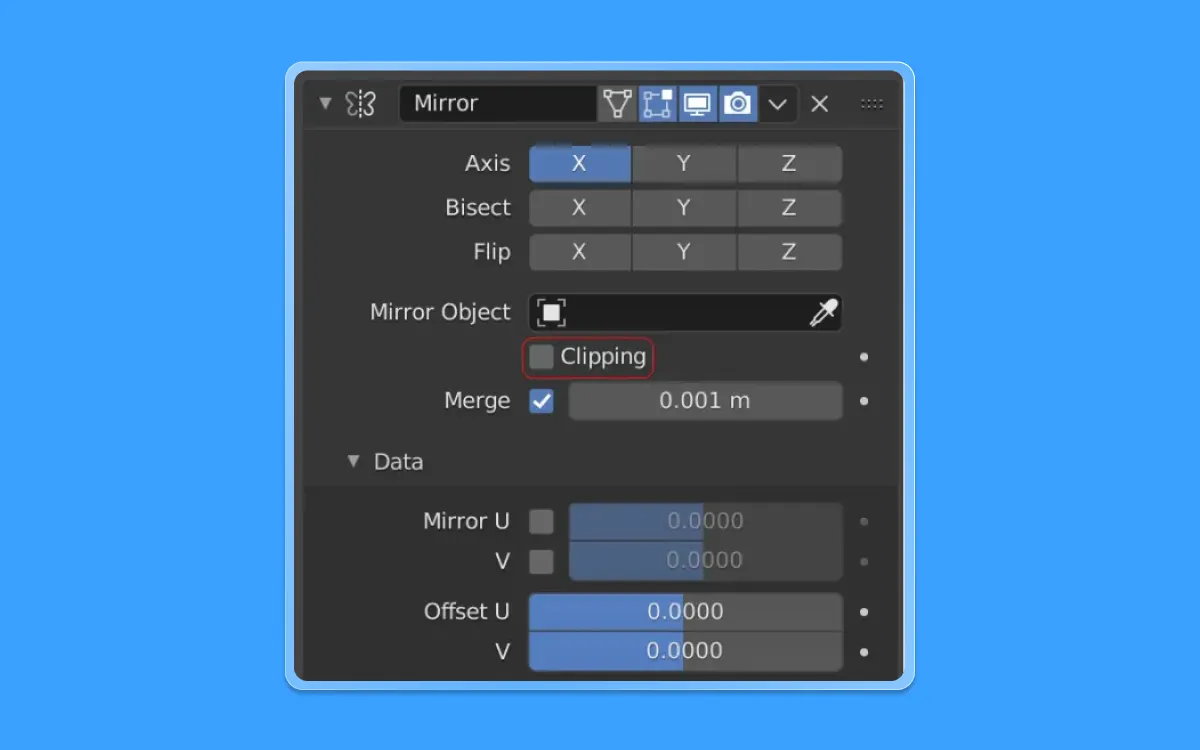
- Now let us further work on this halved cube so that we get the equivalent side. To do that, let us add a "mirror modifier"
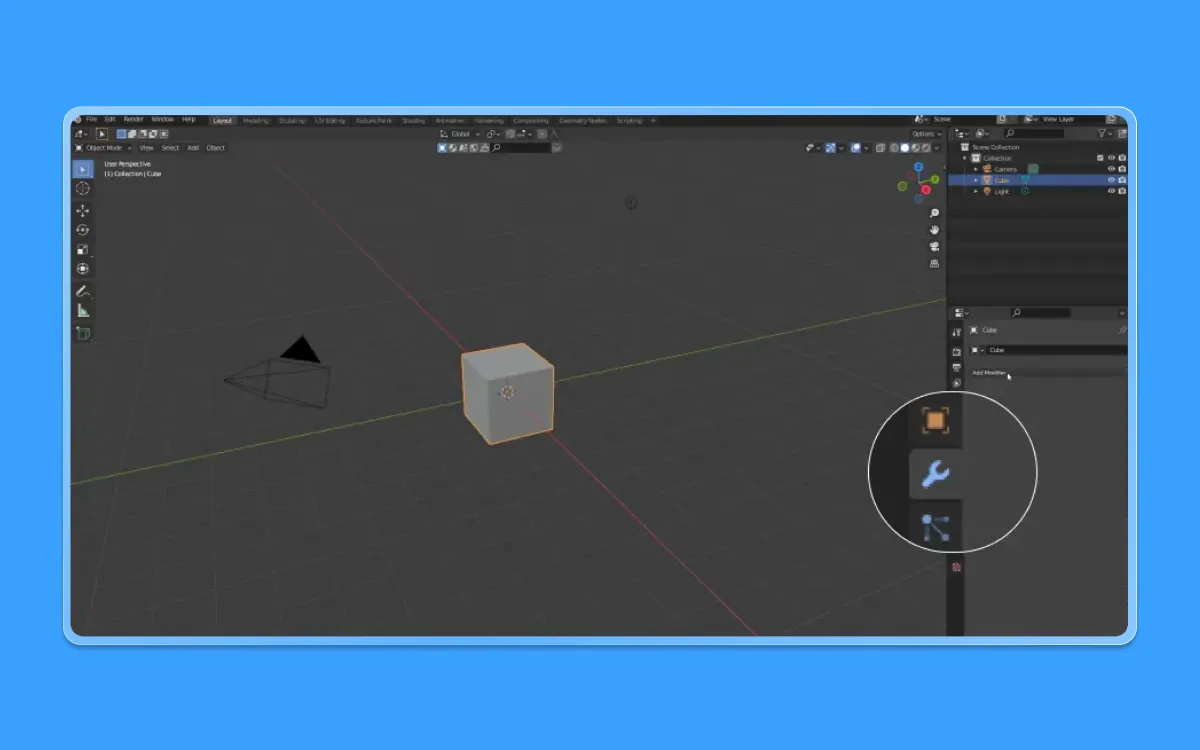
- Hover over to the properties shelf on the right
- Select the menu with the "wrench" icon, which is the "Modifiers tab"
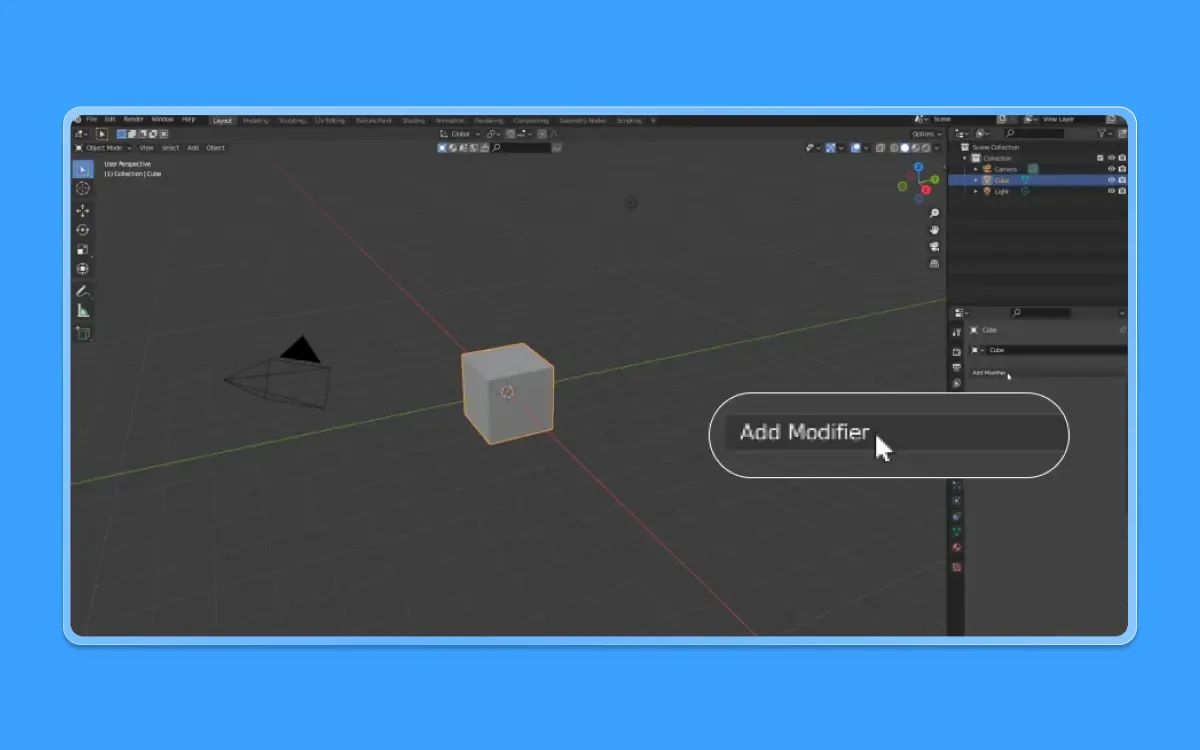
- Next, select the Add Modifier to the drop-down option
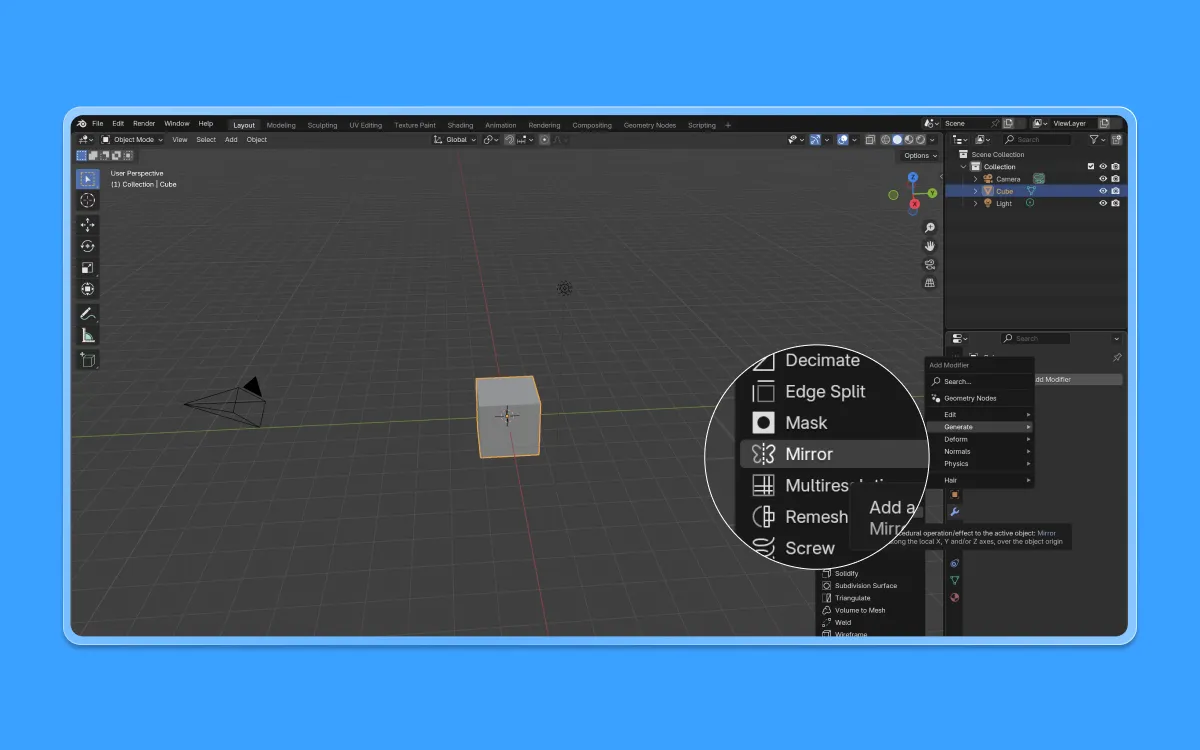
- Select the "Mirror" option
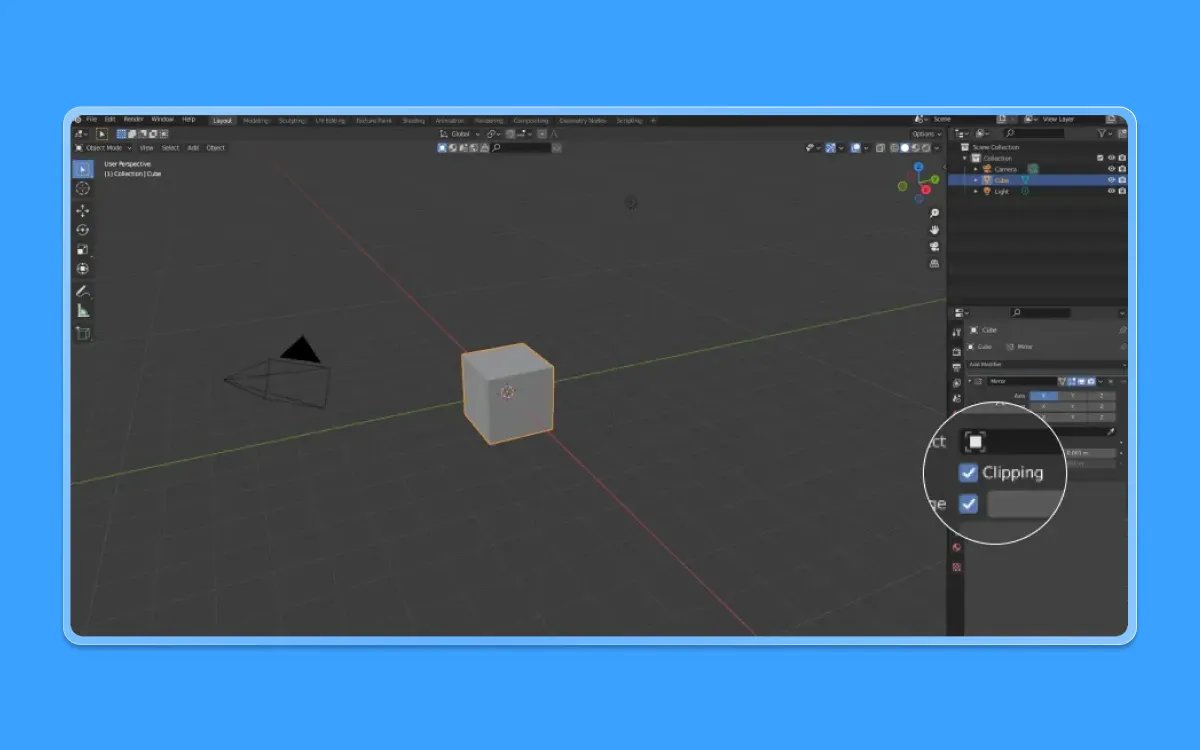
- Enable the "clipping" option from the same menu so that you can see jointed edges
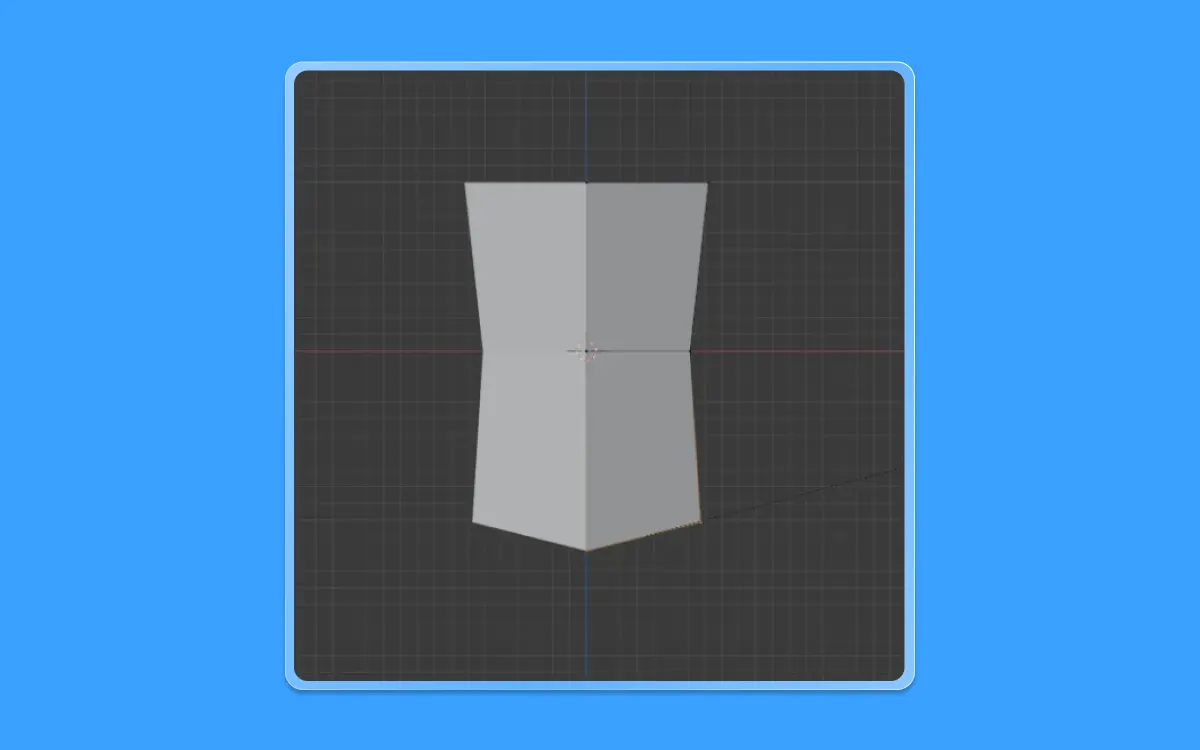
Step 3: Construction
- Now, once we have our mirror modifier enabled, we can start with constructing the rest of our model
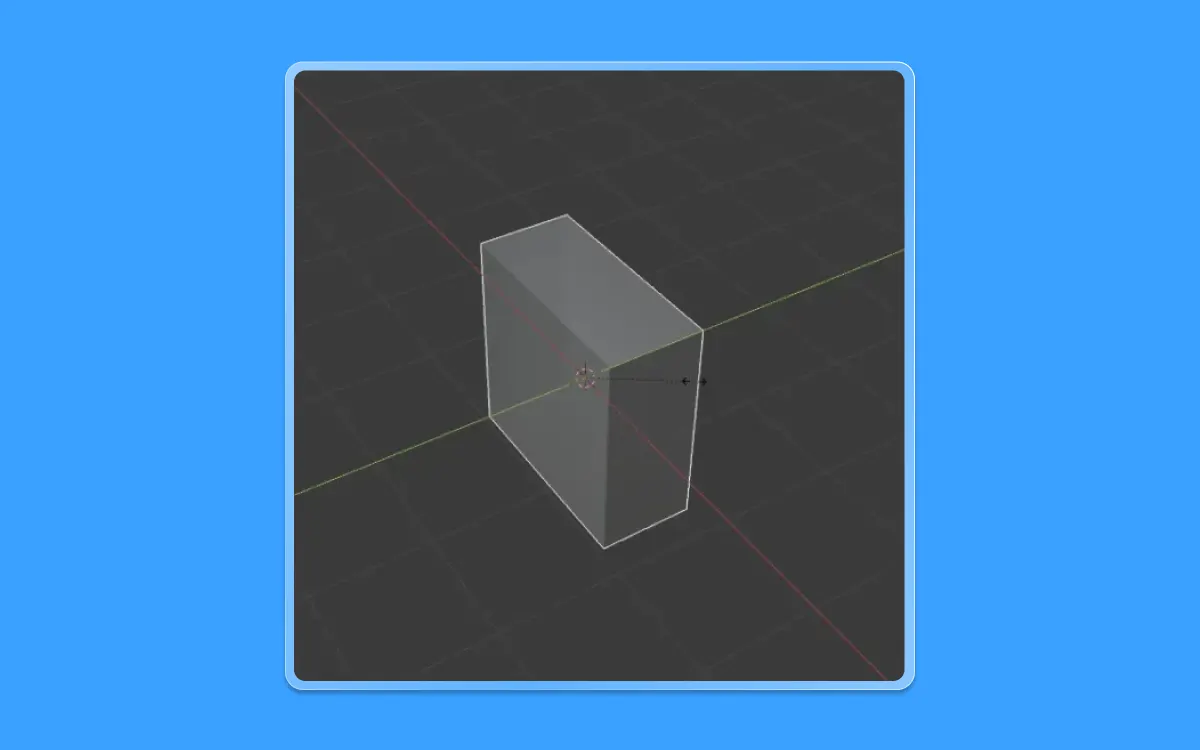
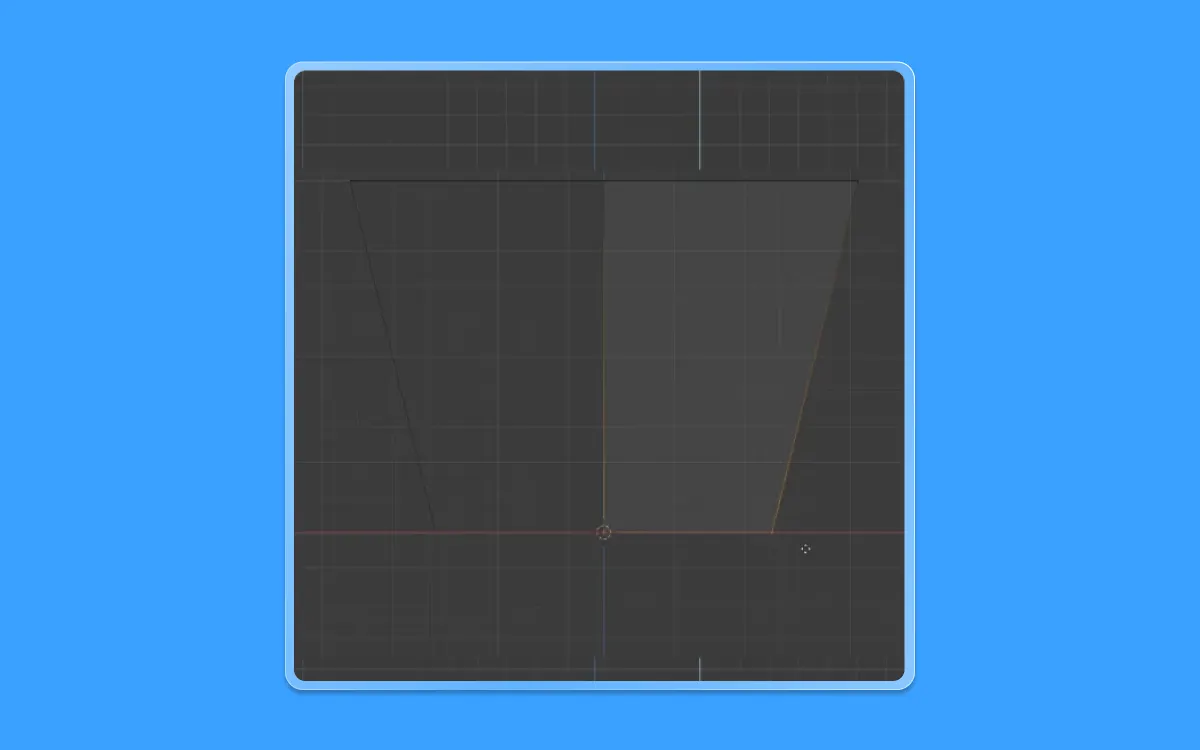
- Let us scale the cube in the Y-axis, so it's thinner
- Press S+Y and move your mouse till you get a familiar shape
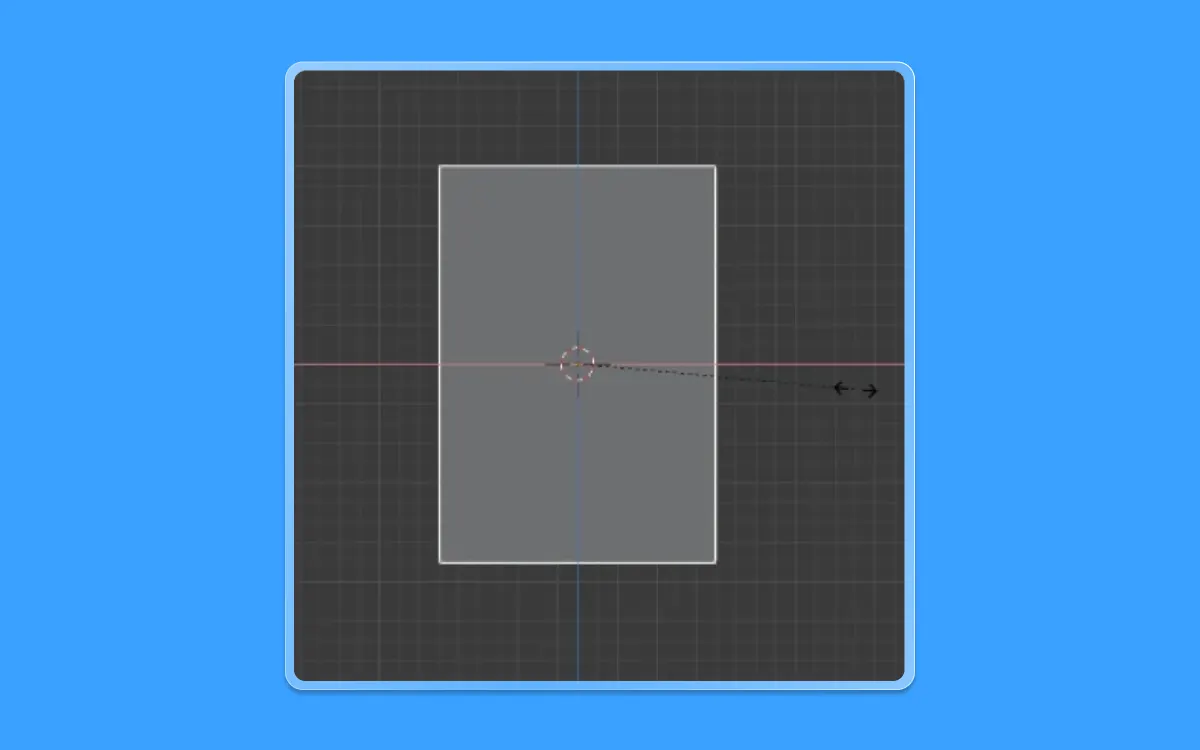
- Now go back into the side view by pressing 1 again on the number pad
- Scale it directly on the X-axis by pressing S(to scale)+X (X-axis) and then again moving your mouse
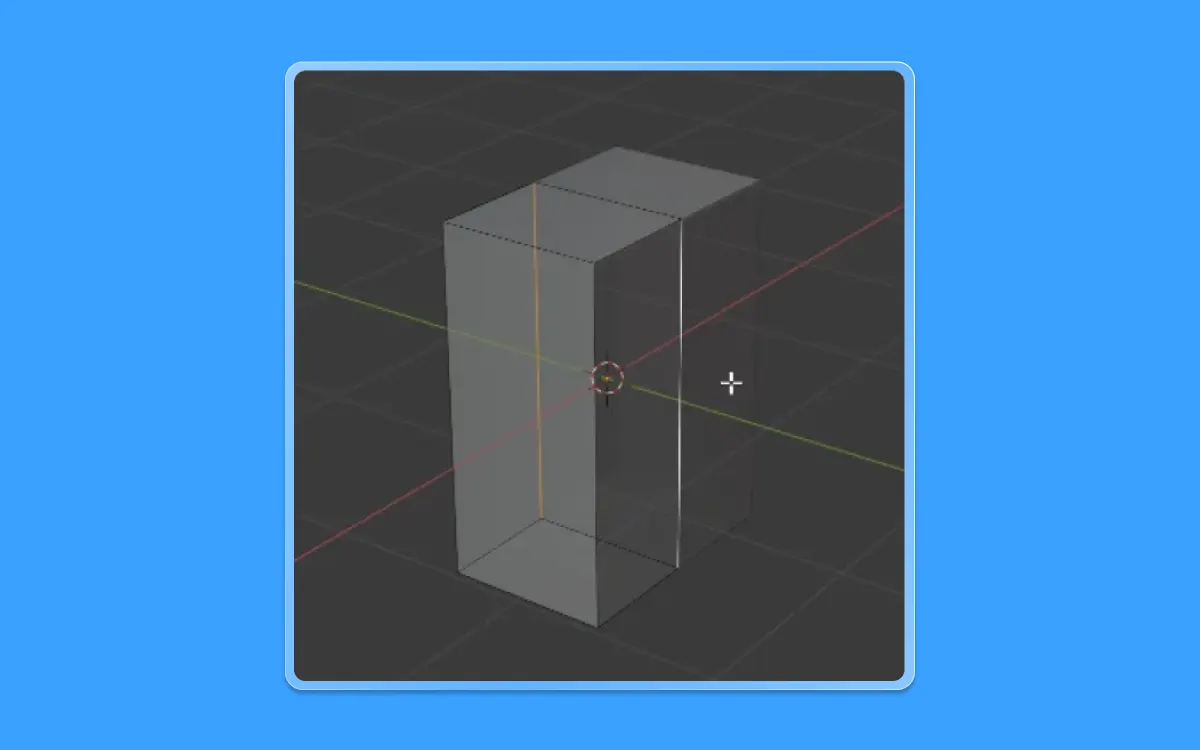
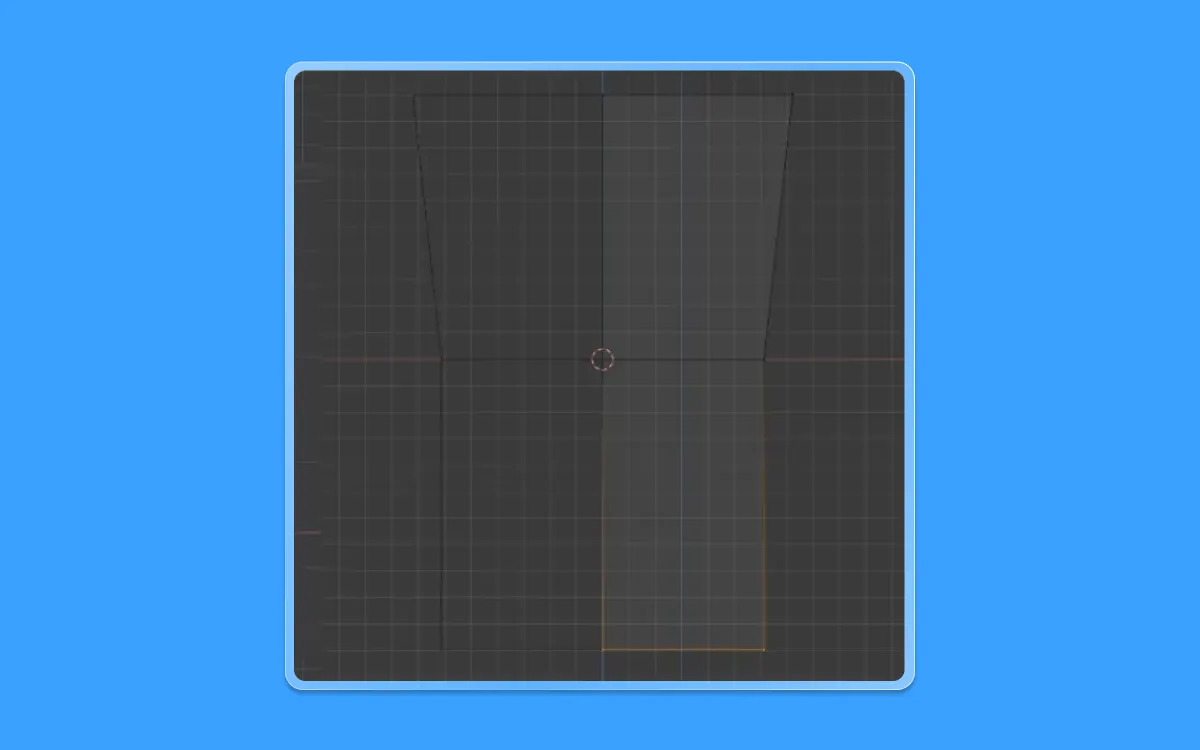
- Let us go back to the 3D view and select two edges
- To do that, go to the edge selection mode by pressing 2
- Once done, press on one of the edges and Shift+Select the other edge to group select it
- Once we have selected these edges, let us scale them in the Y-axis
- Press S(to scale)+Y(on the Y-axis) and then move the mouse accordingly till you get a result
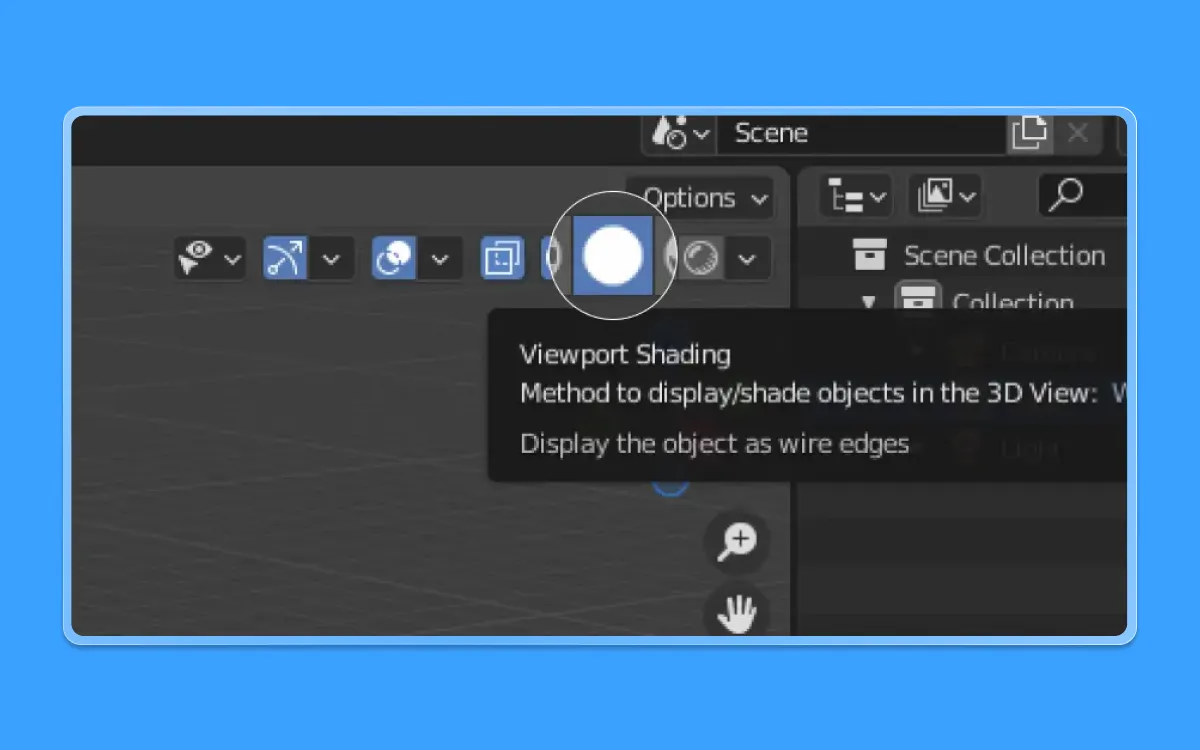
Step 4: Wireframe
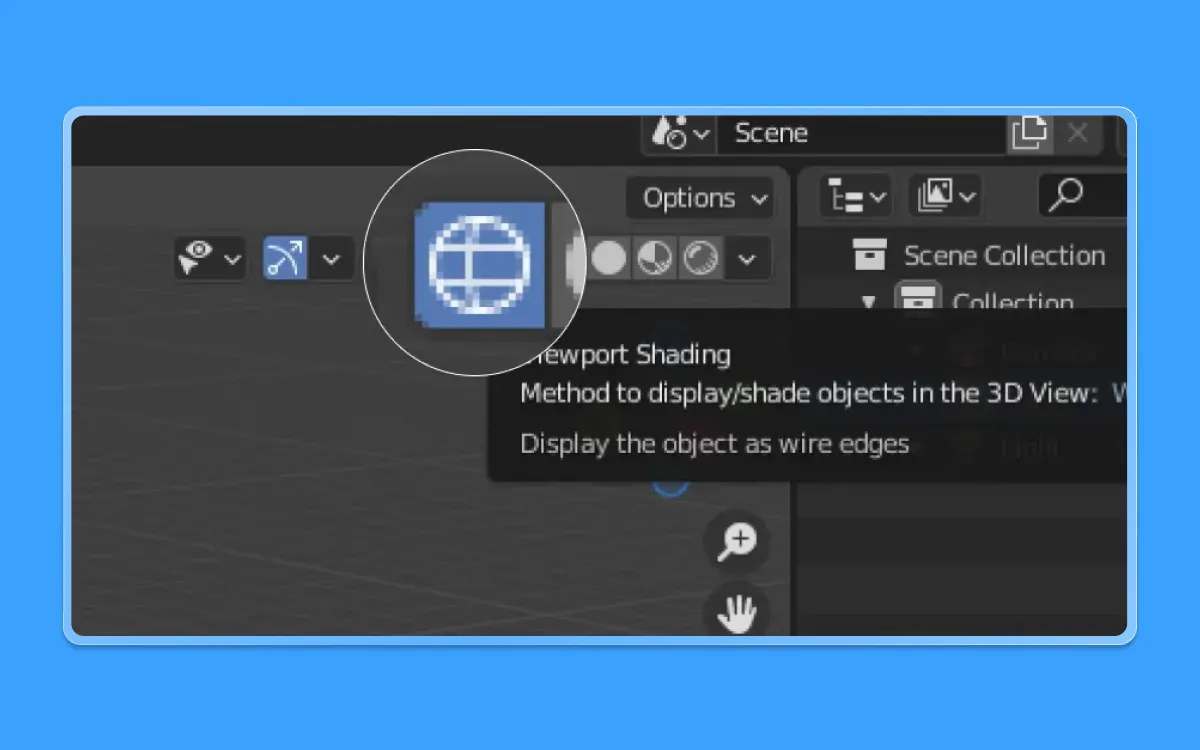
- Now let us go into the wireframe model to see things more clearly
- Press the located on the top right corner of your screen
- Now go back into the side view by pressing 1 again on the number pad
- Now, let us go into the Vertex selection mode by pressing 1
- Select two vertices from the geometry
- Now let us move these vertices a bit to the top by pressing G(to move) + Z(on the Z-axis)
- Scale the same vertices in the X-axis as well
- Let us extrude the same vertices below by pressing E(to extrude) + Z (on the Z-axis)
- Scale it once again in the X-axis by pressing S+X and then moving the mouse
- Now let us go back into the solid view mode by pressing the "Viewport shading" button on the top right corner
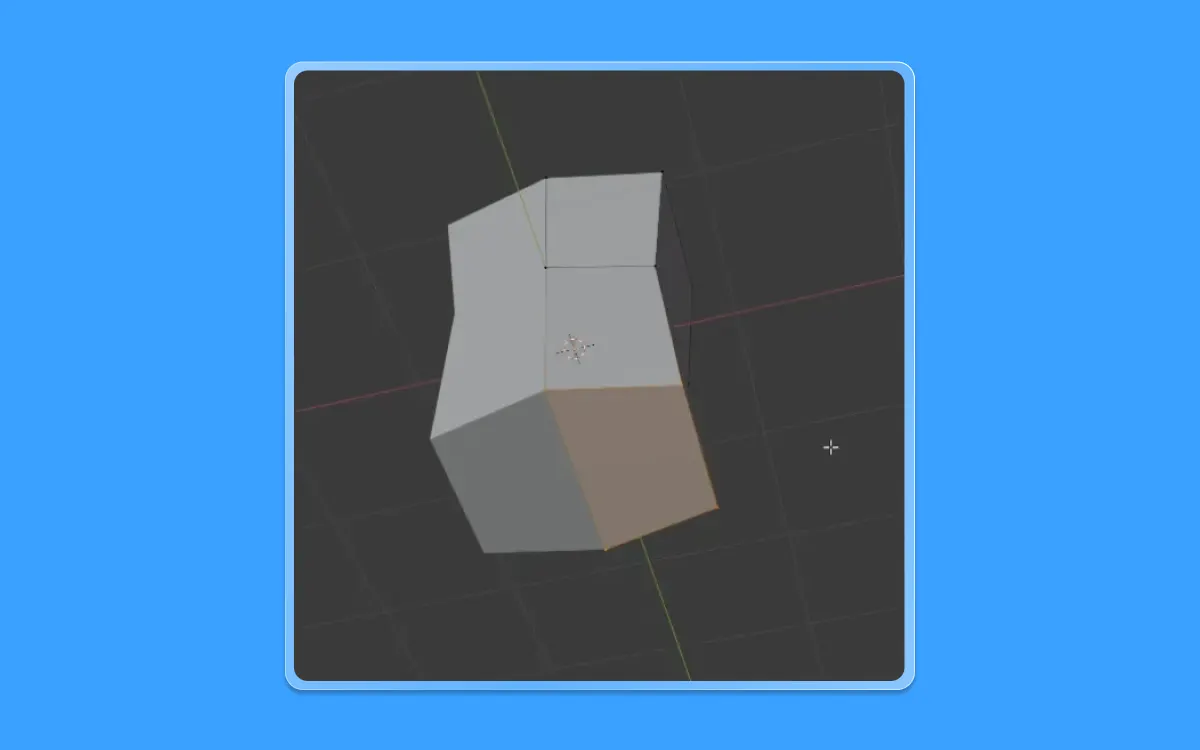
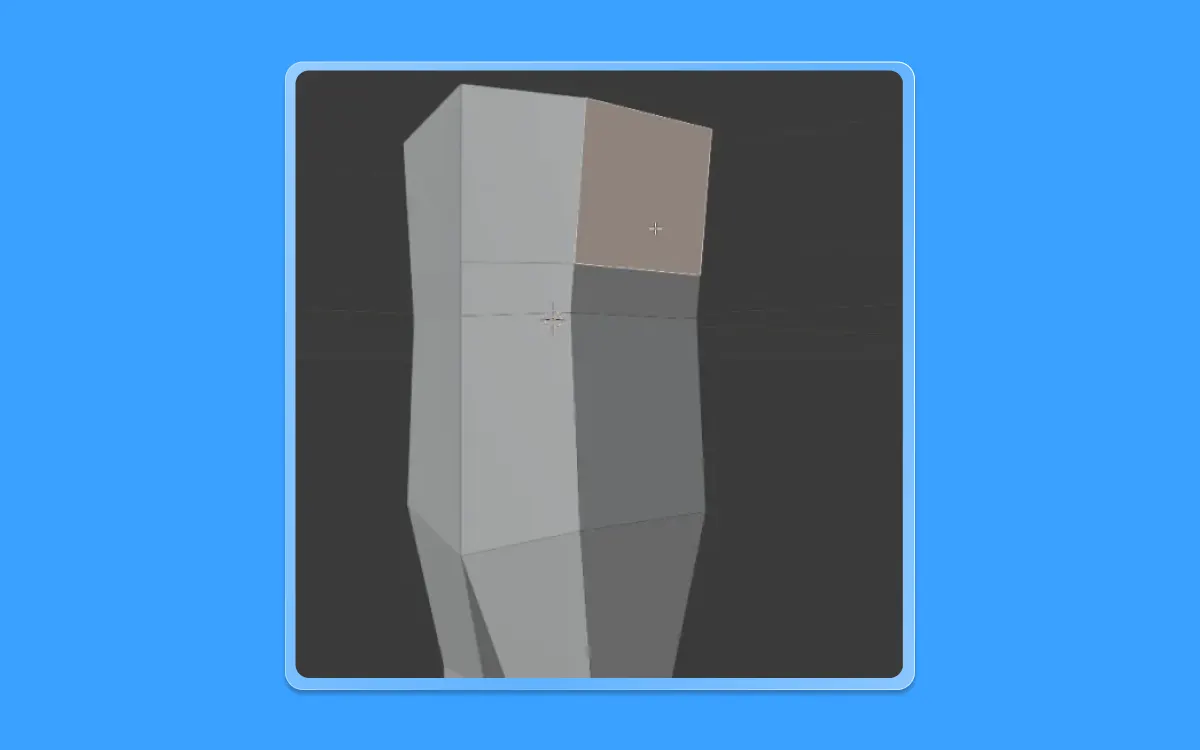
- Go to the angle in the viewport and let us select this face in the model
- Back to the front view, by pressing 1 on the number pad
- Rotate the axis on the Y-axis by pressing R(to rotate)+ Y (on the Y-axis)
- We have our torso ready
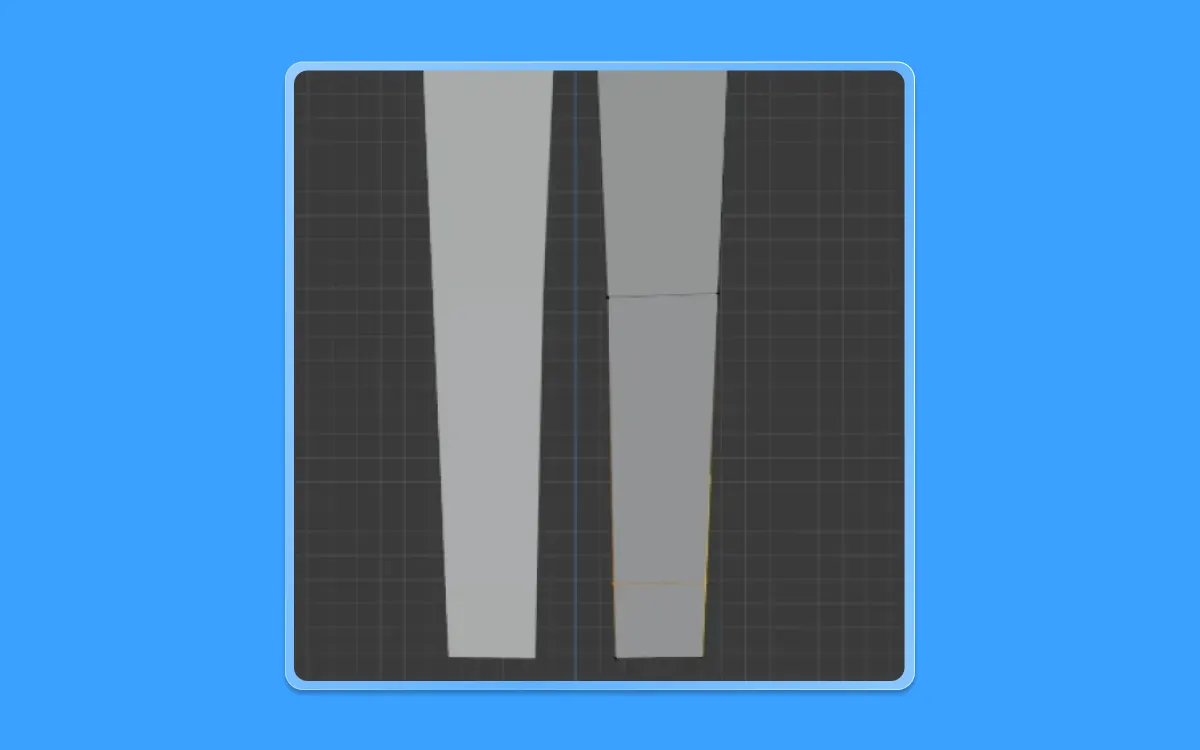
- Now let us turn off clipping to extrude the legs
- Click the checkbox to disable clipping
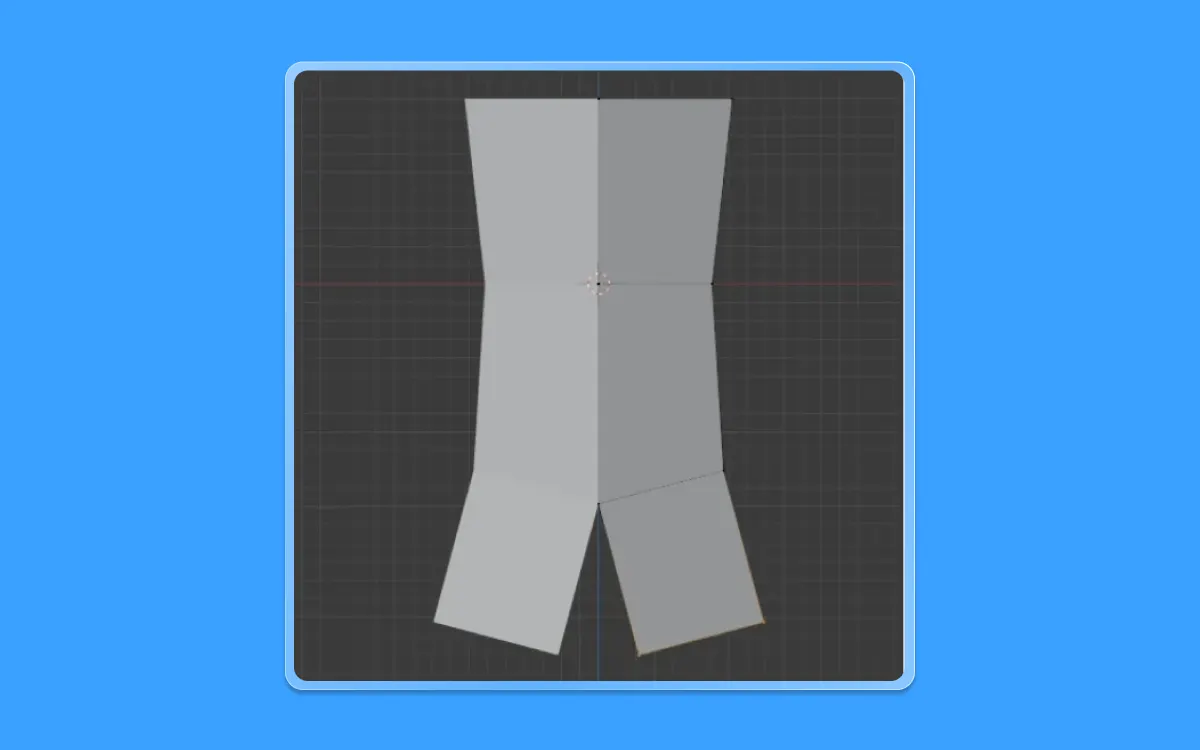
- Click E(to extrude) and drag the mouse till you get the thigh's shape
- After you extrude the thighs, let us straighten them. Press R(to rotate) and rotate the same face until they become straight
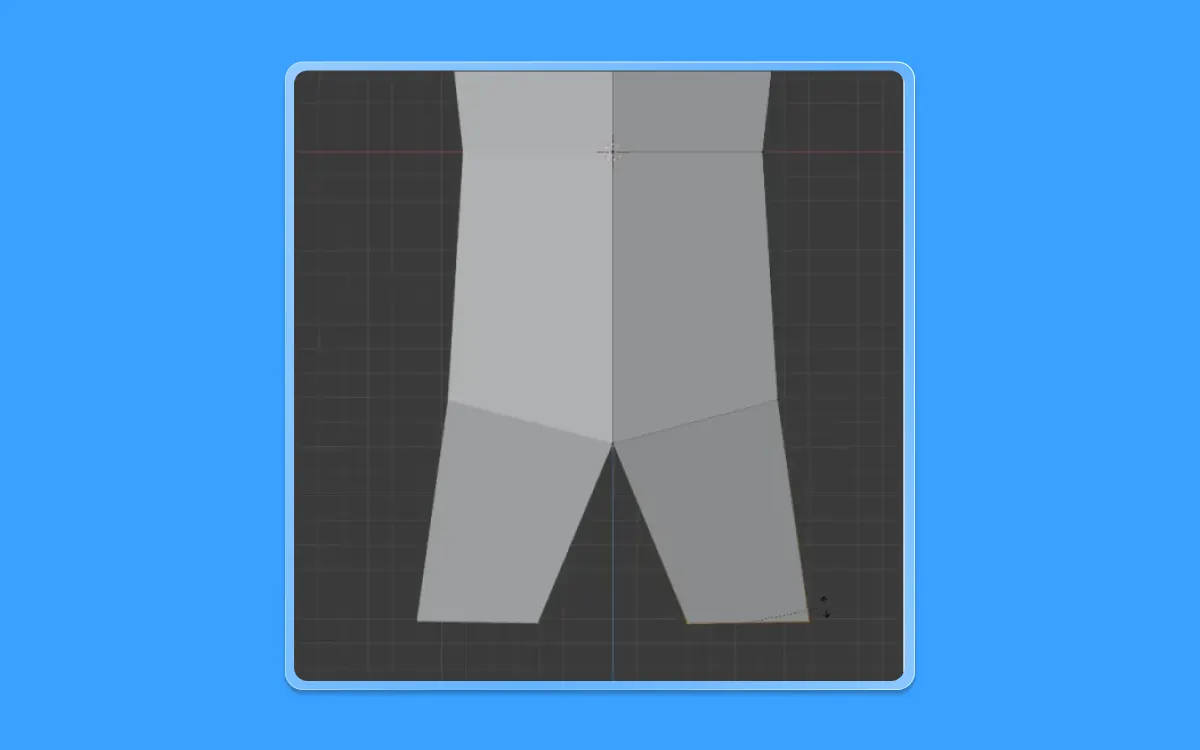
- Move the thighs a bit closer together by pressing G(to move) +X(on the X-axis) and then drag the mouse to bring them closer
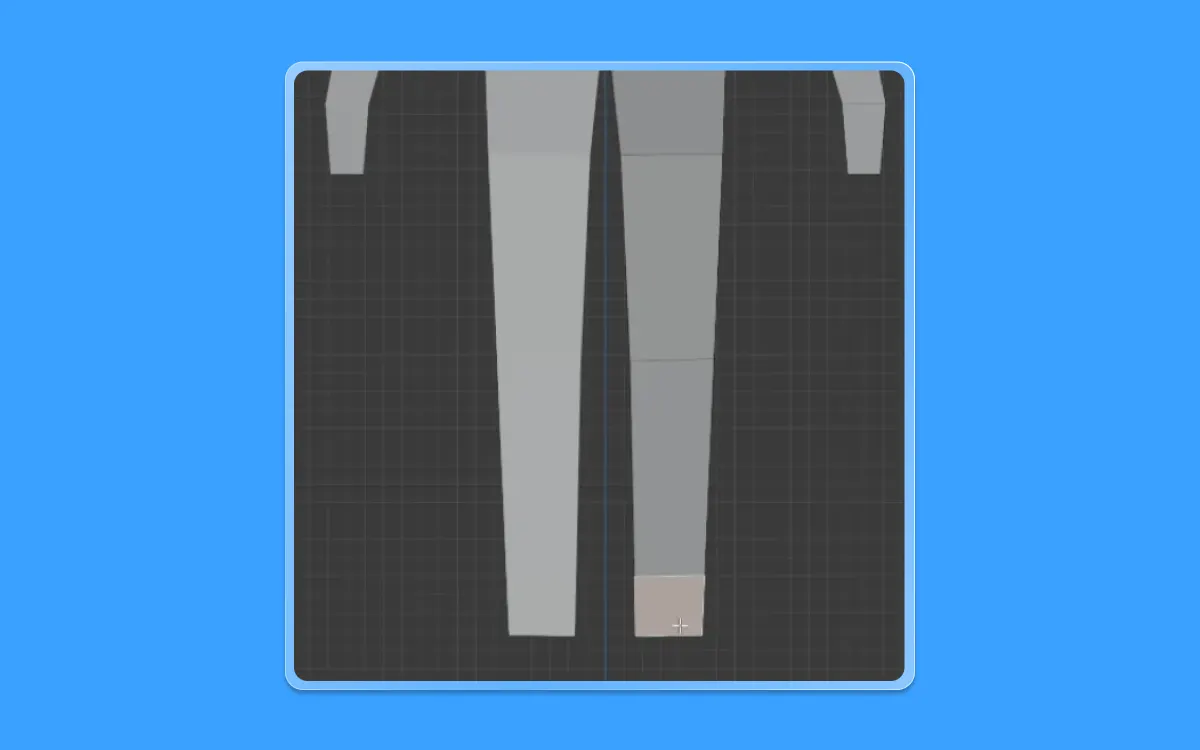
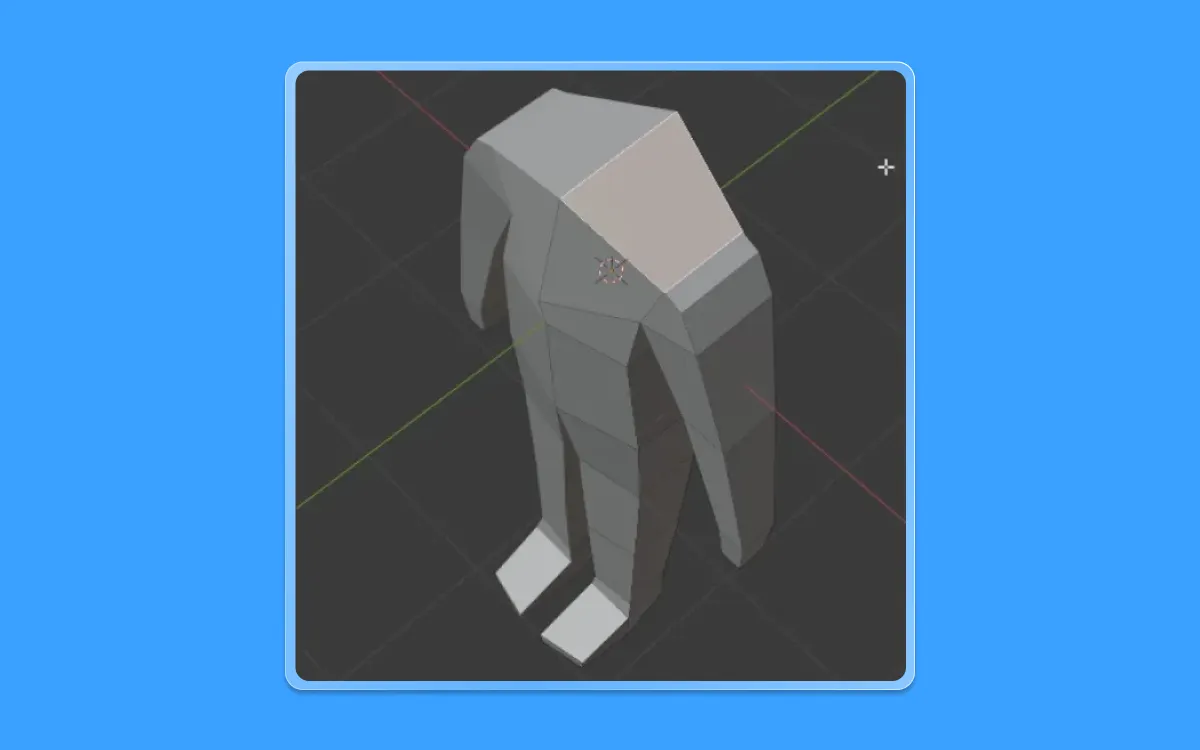
- While having the face selected, Extrude it once again to the bottom by pressing E( to extrude) + Z(on the Z-axis) and dragging the mouse to get the desired shape
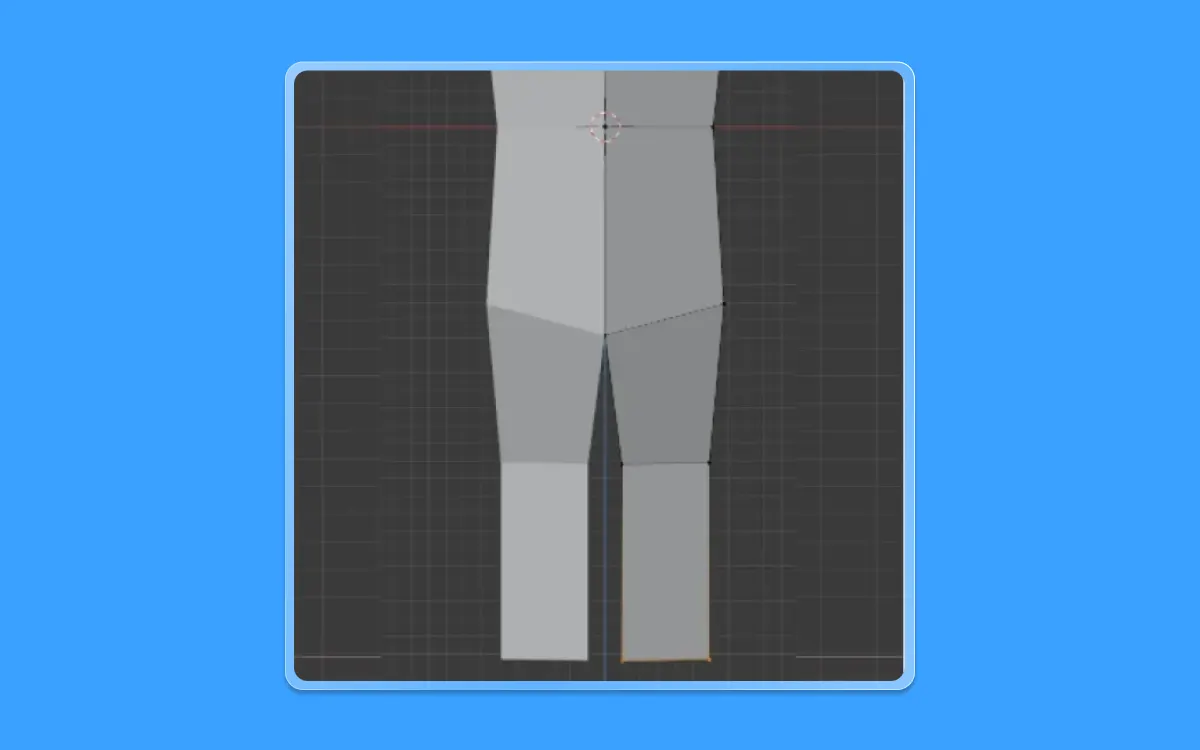
- Now we have the thighs and knees ready
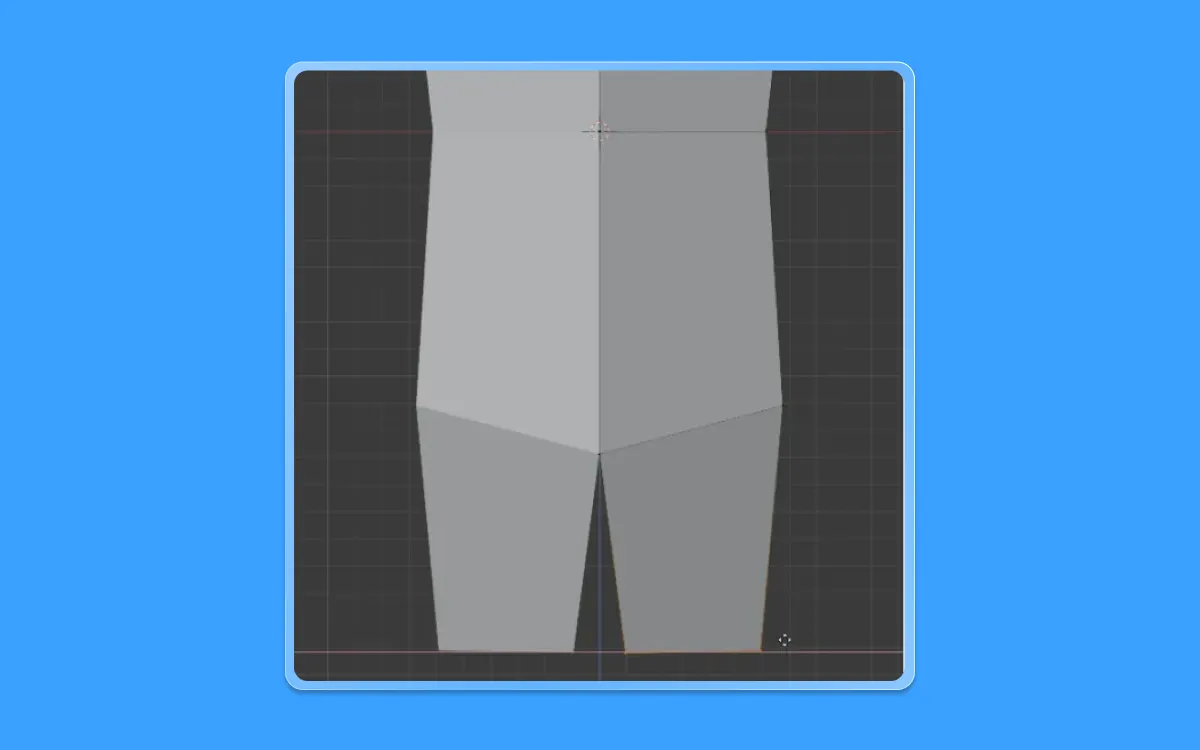
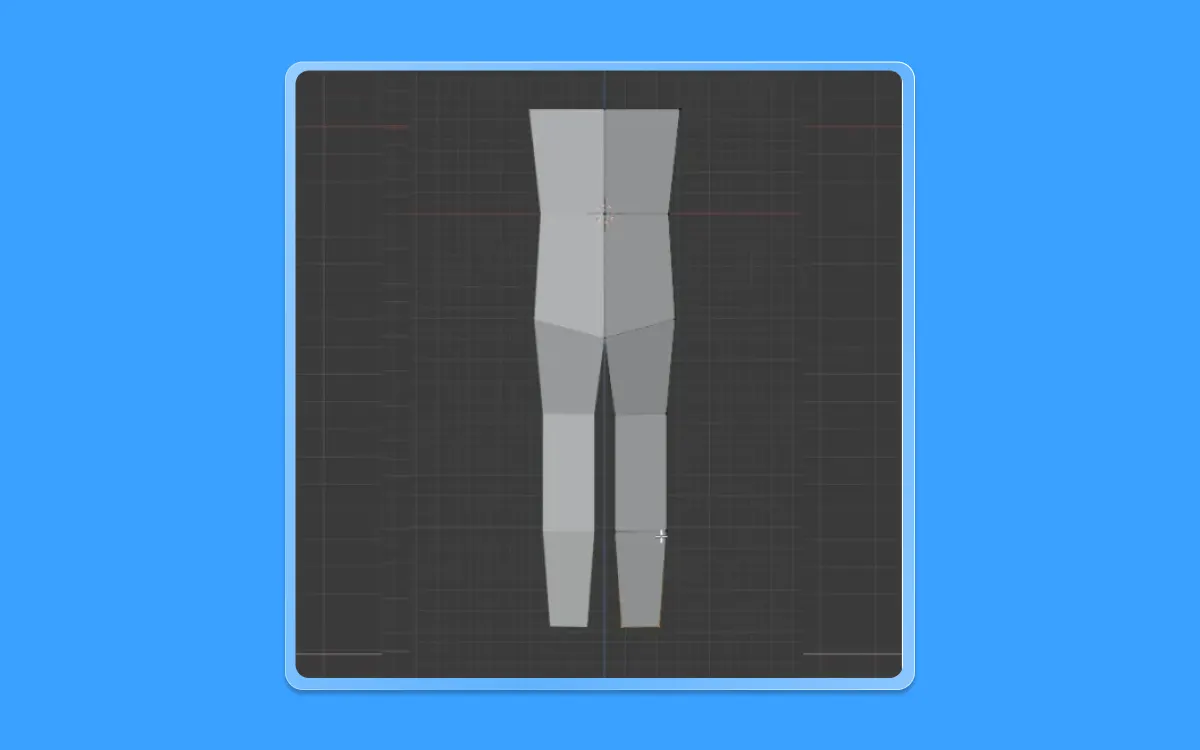
- Extrude it using E+Z and drag the mouse once again to create the shin area.
Next, let us fix a few things on the body.
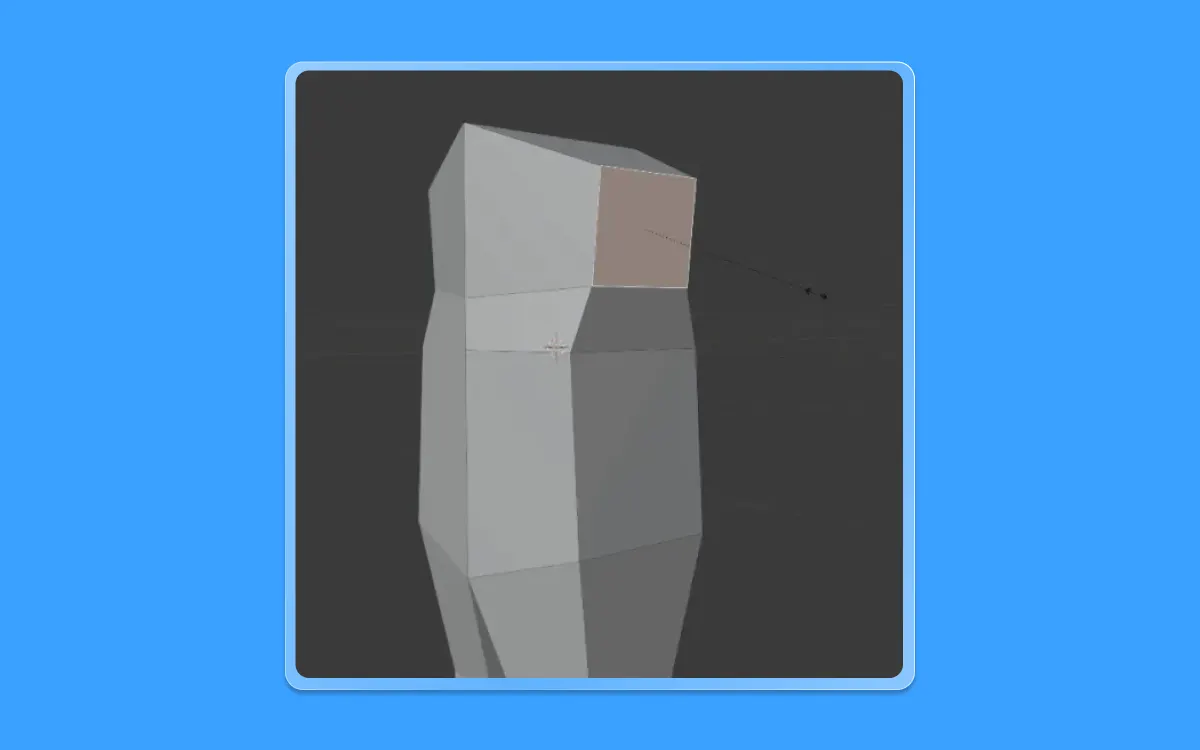
- Rotate freely in the viewport by moving the mouse while pressing the middle mouse, rotating to the top angle of the body, and selecting the face
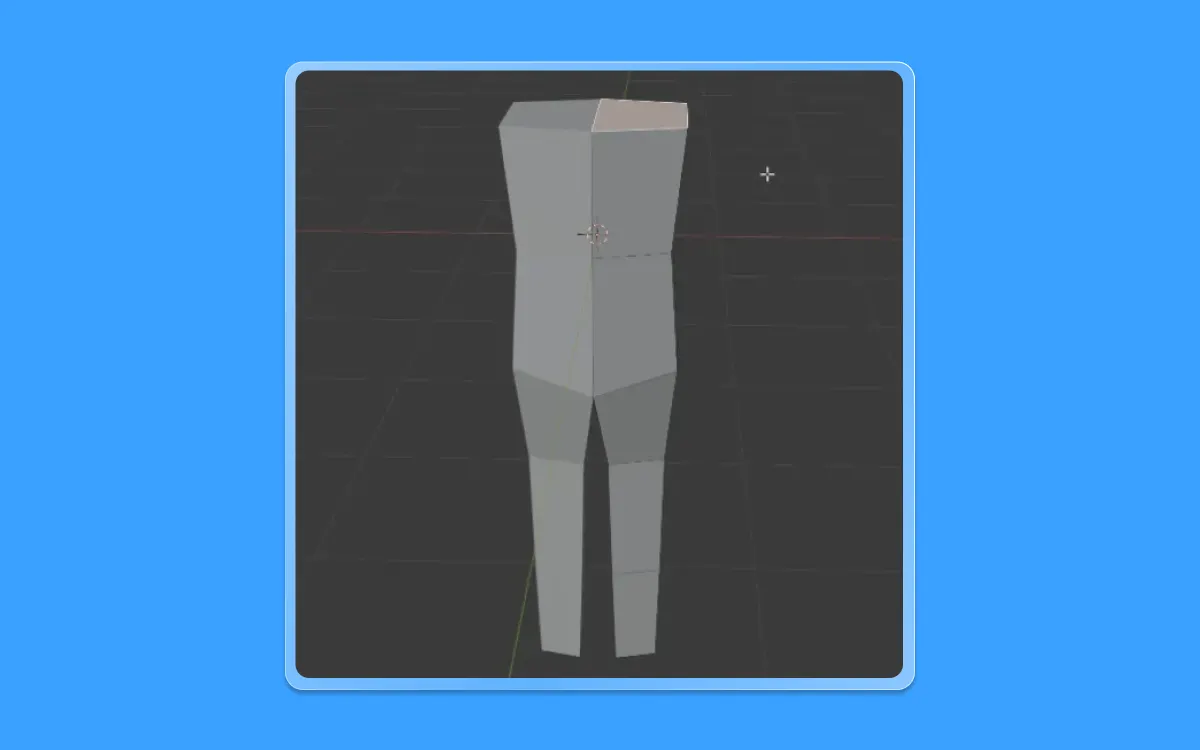
- Jump back into the front view by pressing 1 and rotate this face by pressing R(to turn) + dragging the mouse till we get a shape
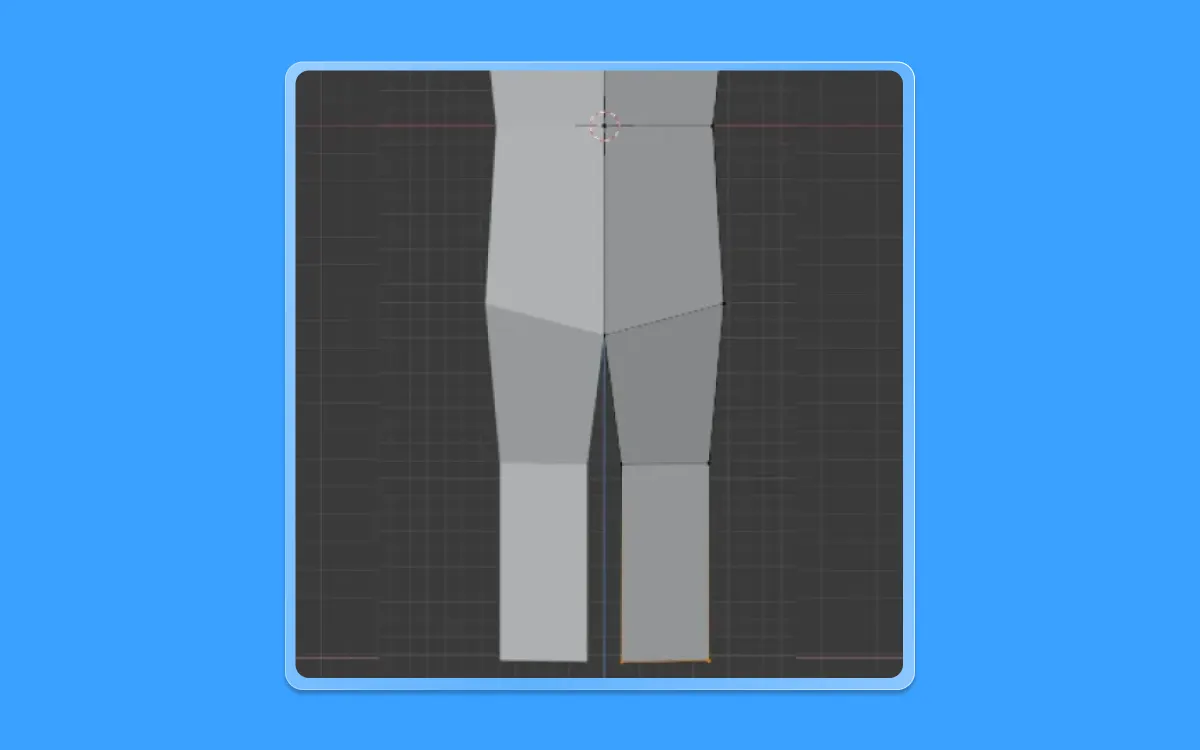
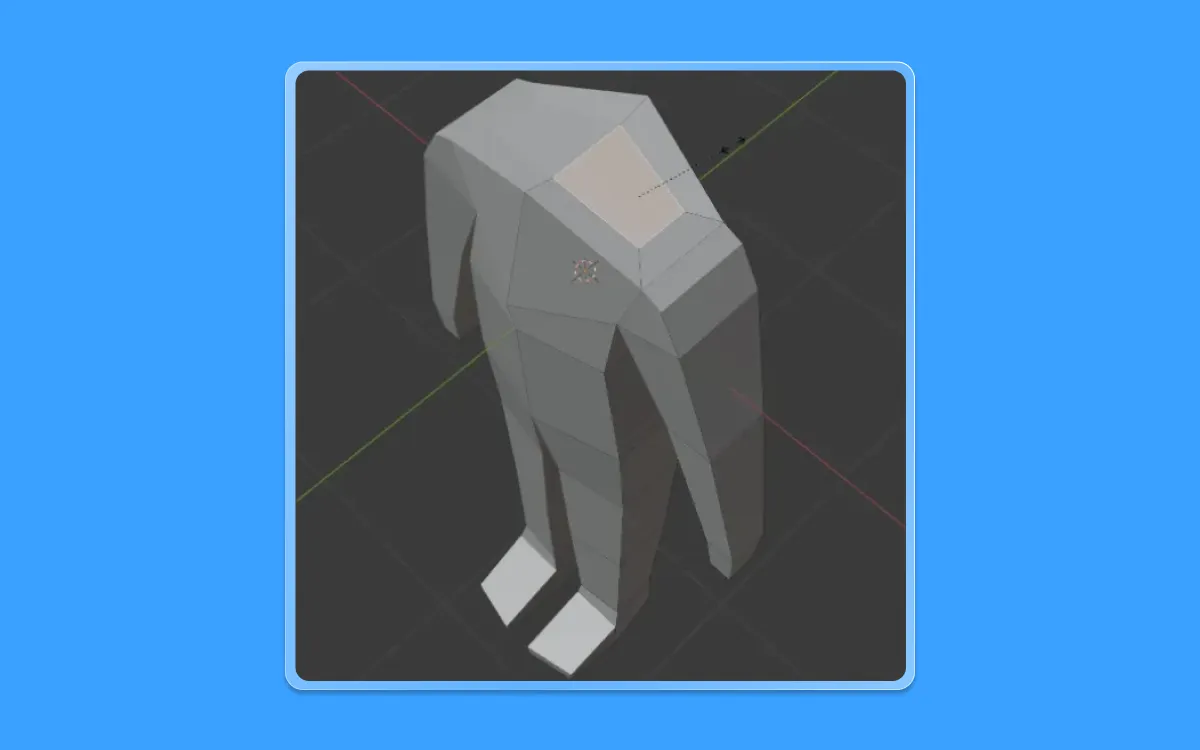
- Now let us create a loop on the upper torso side of the body
- To do so, let us press Ctrl+R and then drag it down and press the left click of your mouse to confirm the cut
- Next, let us select this particular face from the upper torso.
- And then let is scale down a little bit, using the S (to scale) button
- Go back into the front view once again by pressing 1 on the number pad
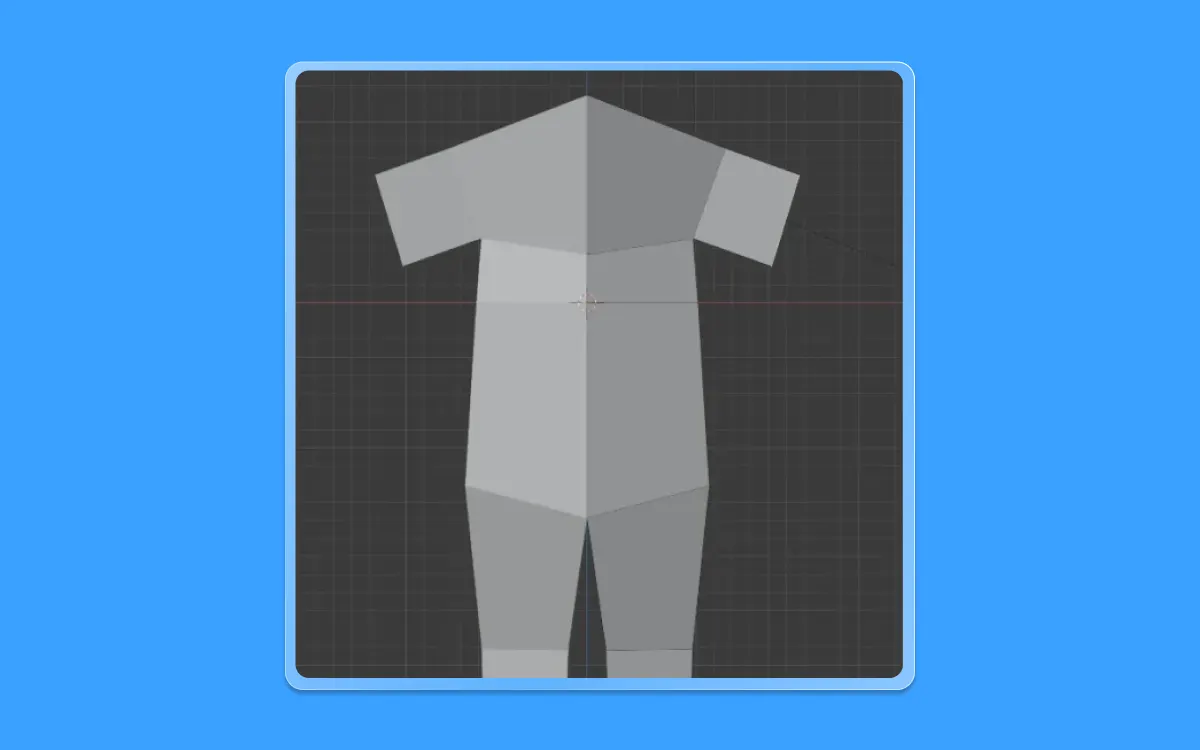
While having the same face selected, let us extend it by pressing E and dragging the mouse so that we get the beginning of the shoulders
- After that, let's go into vertex selection mode by pressing 1 on the number pad
- Turn on the X-Ray mode by pressing (Alt+Z)
- Drag and select the individual vertices into the desired shape
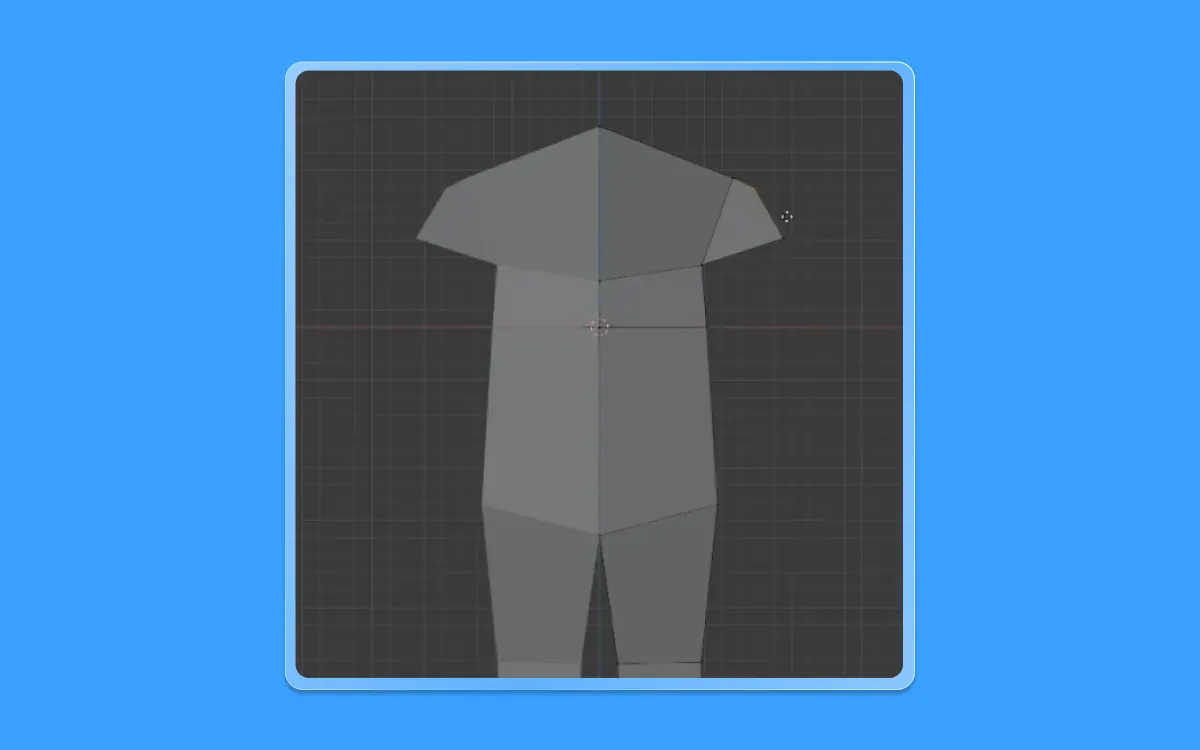
- Now, go back to face selection mode by pressing 3 on the number pad and selecting the face below
- Go to the front view by pressing 1 on the number pad
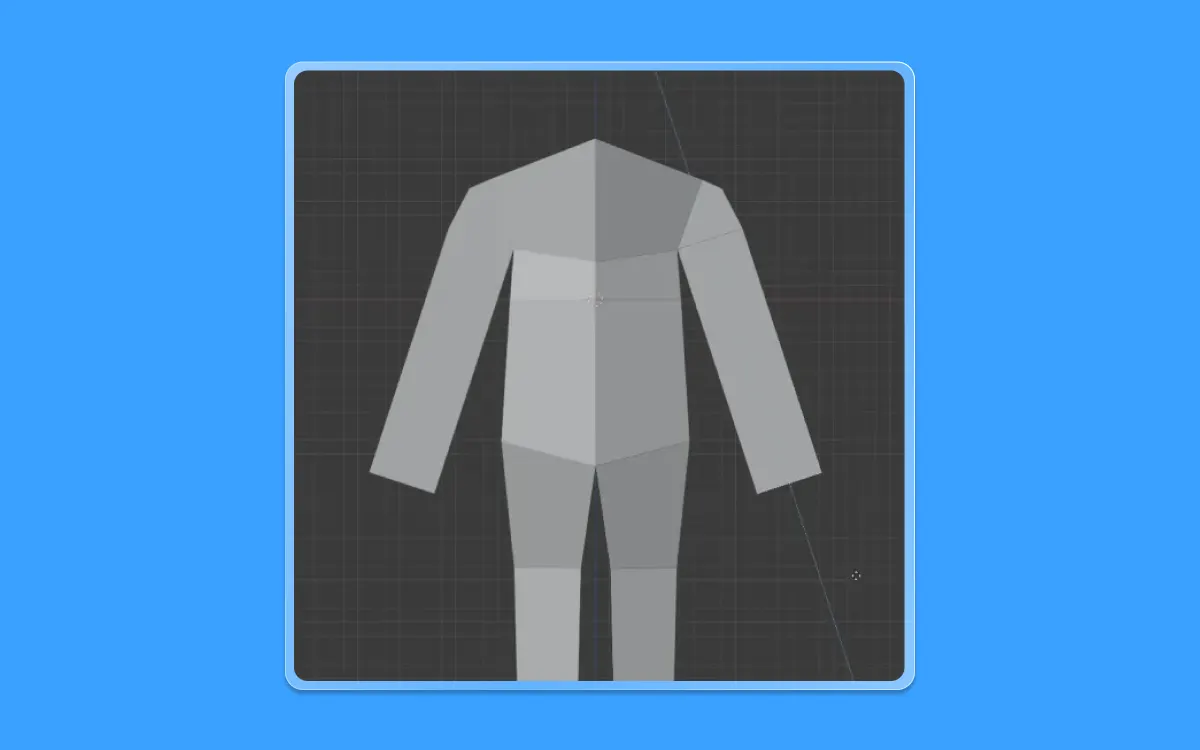
- Extrude the arms out by pressing E then mouse to drag and select to confirm the desired length
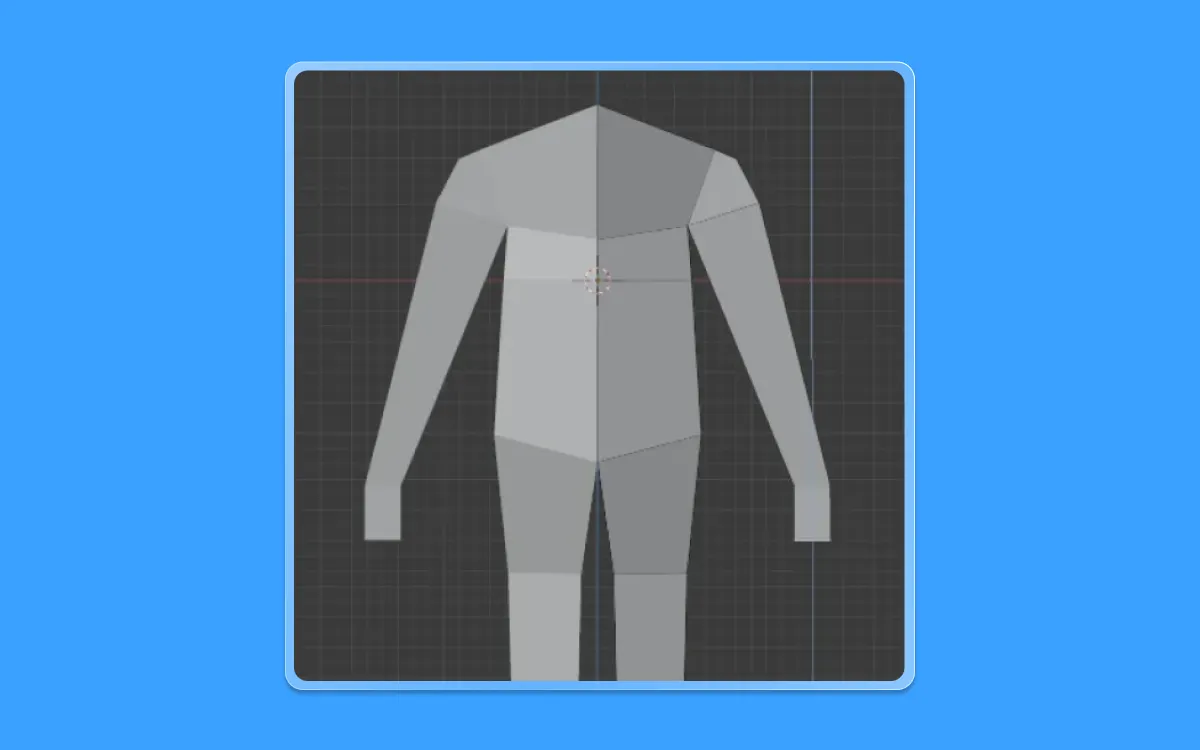
- Once you have created the arms, let us also create the palm by extruding another set
- Press E(to extrude) and drag the mouse and left click to confirm the desired proportion
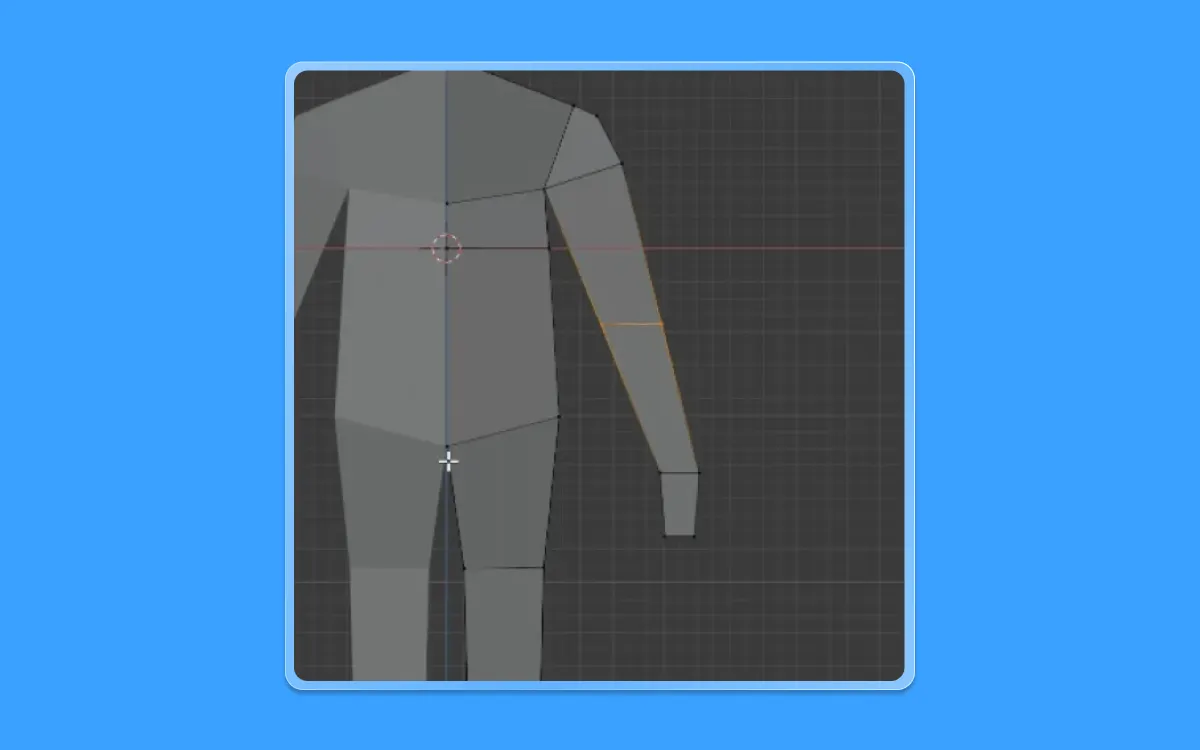
- Create an edge loop where the arm bends
- Press Ctrl+R to create the edge loop and click the left click of the mouse to confirm it
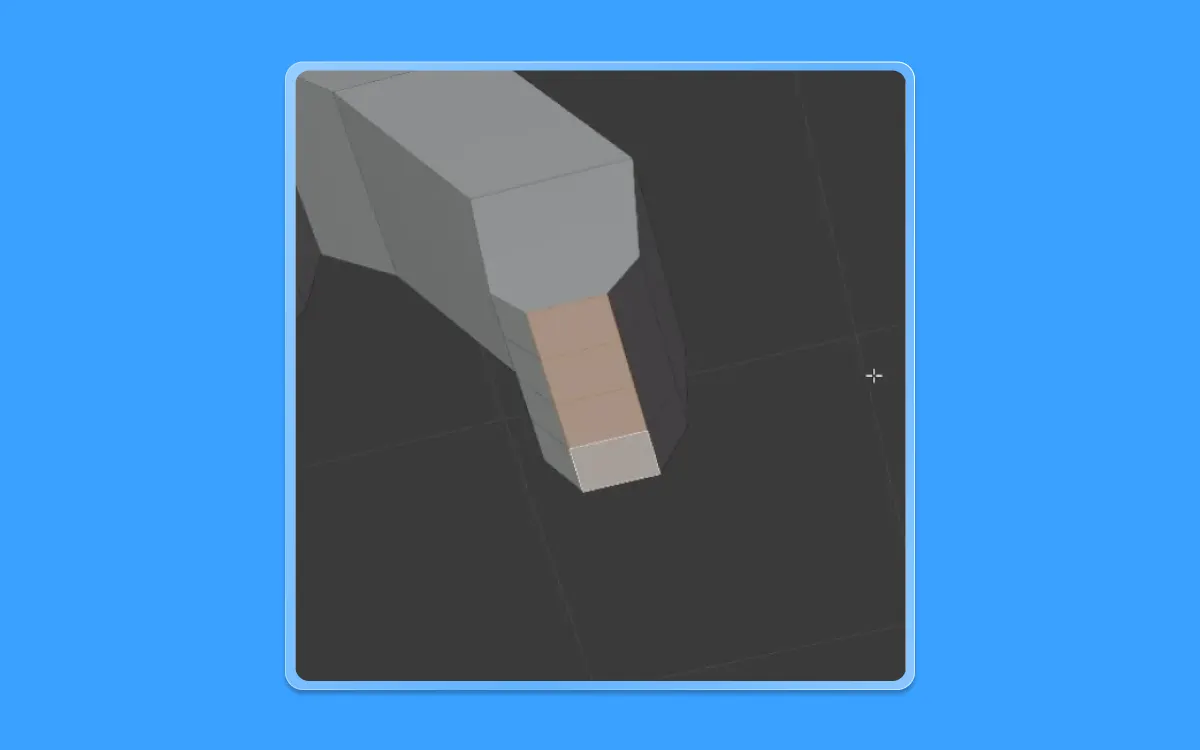
- Let us also create an edge loop around the lower shin area to create the feet
- Press Ctrl+R and drag the mouse till you get a shape
- Once you have created the edge loop, select the new face you have made
- To do so, let us go into face selection mode by pressing 3 in the number pad
- Select the desired face
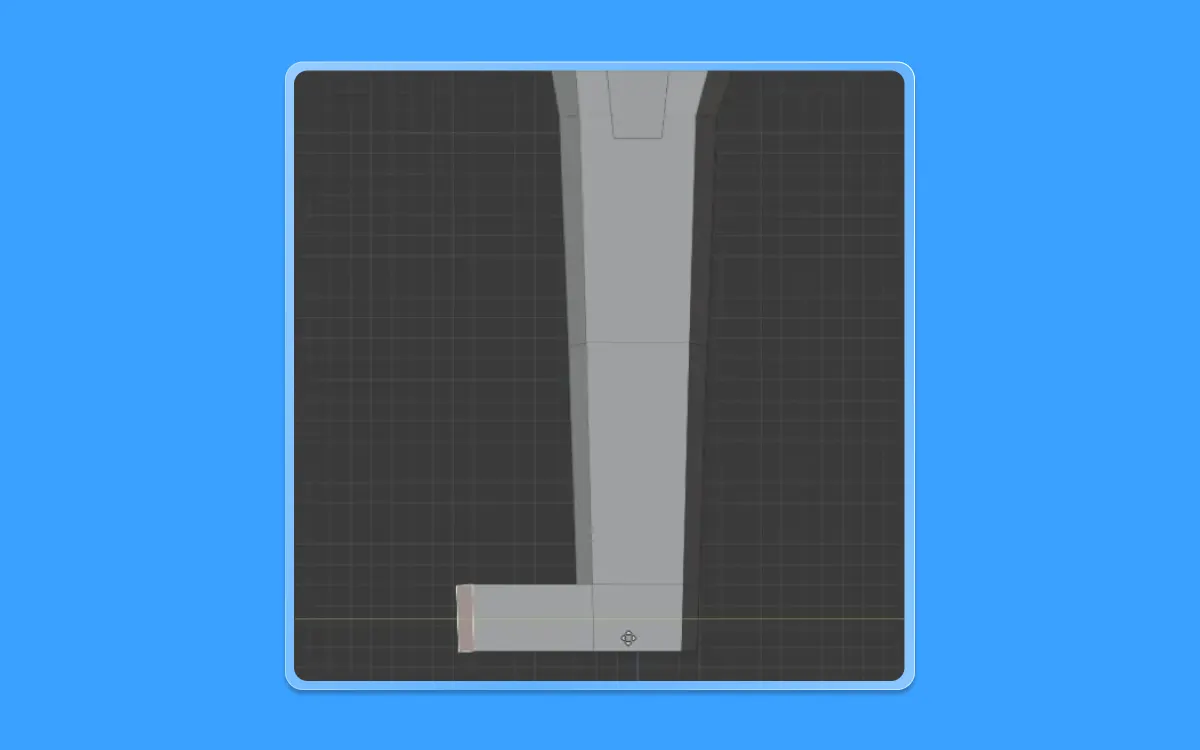
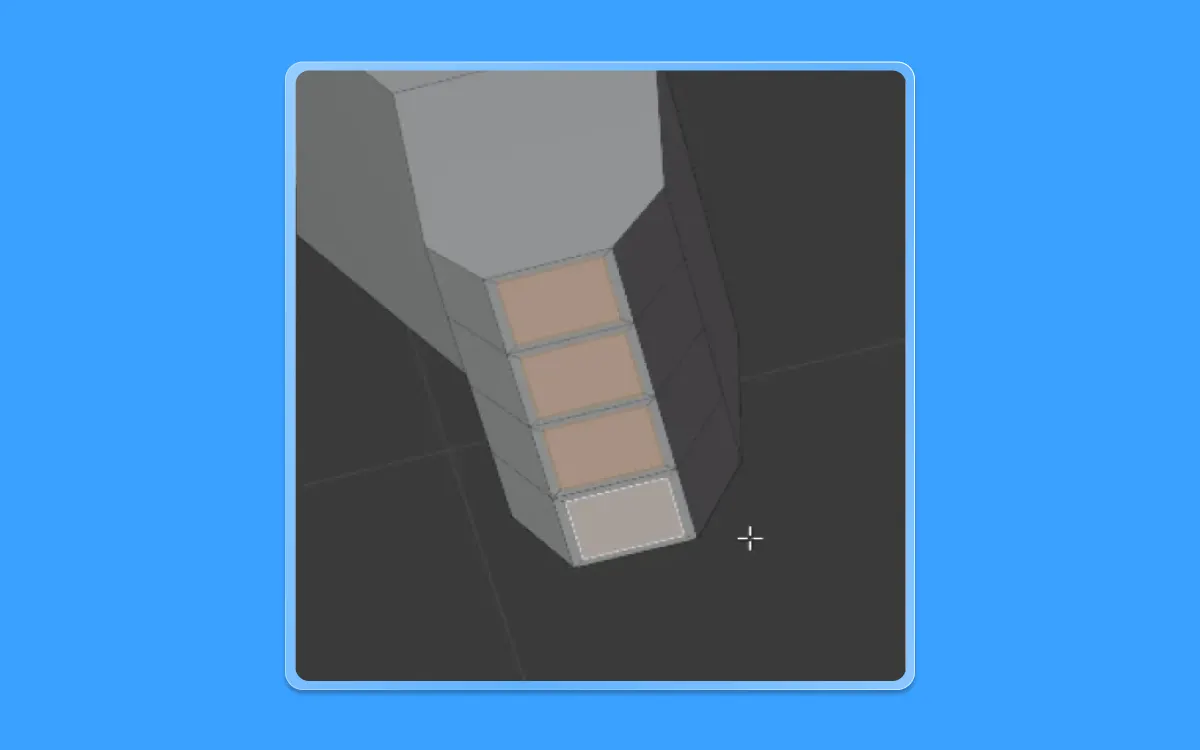
- Now let us go into the side view by pressing 3 in the number pad
- To extrude these feet, press E(to extrude)+ Y( in the Y-axis) and extrude it out till you get the desired shape

- After doing so, go into the edge selection mode by pressing number 2 on the number pad. Now select this particular edge
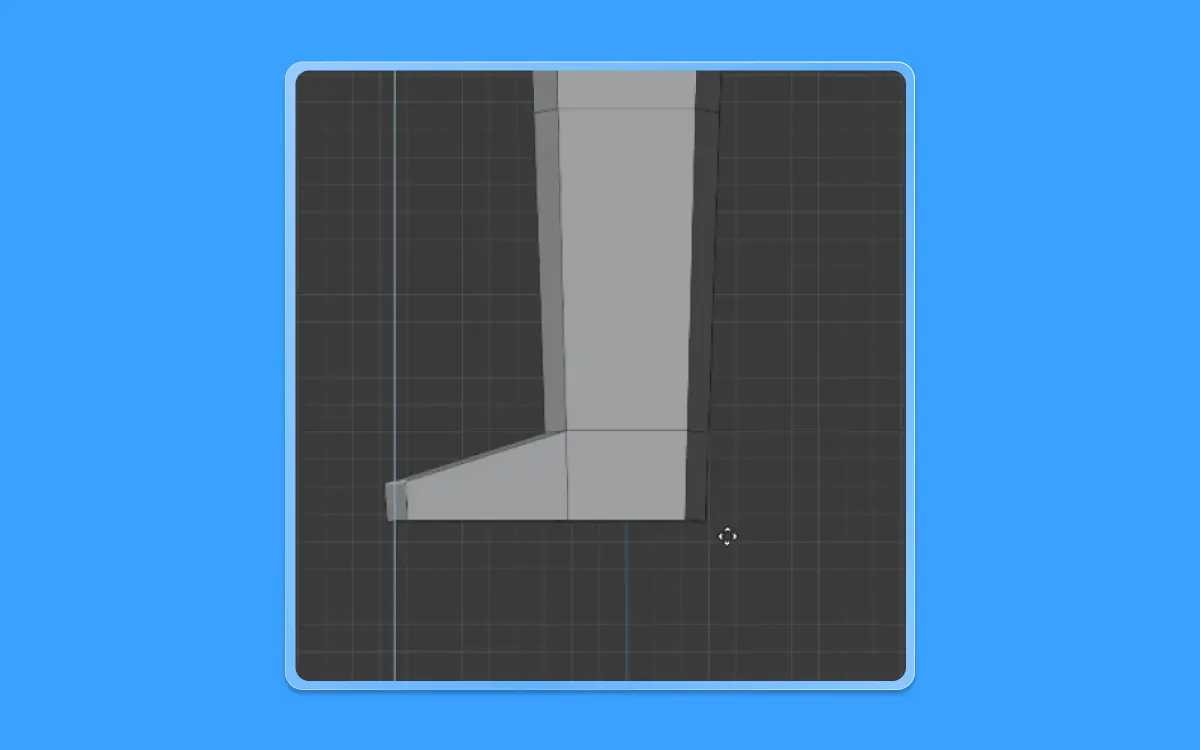
- Press G(to move) + Z(in the Z-axis) and move that edge downwards using the mouse and click left-click to confirm it till you get a shape, like so
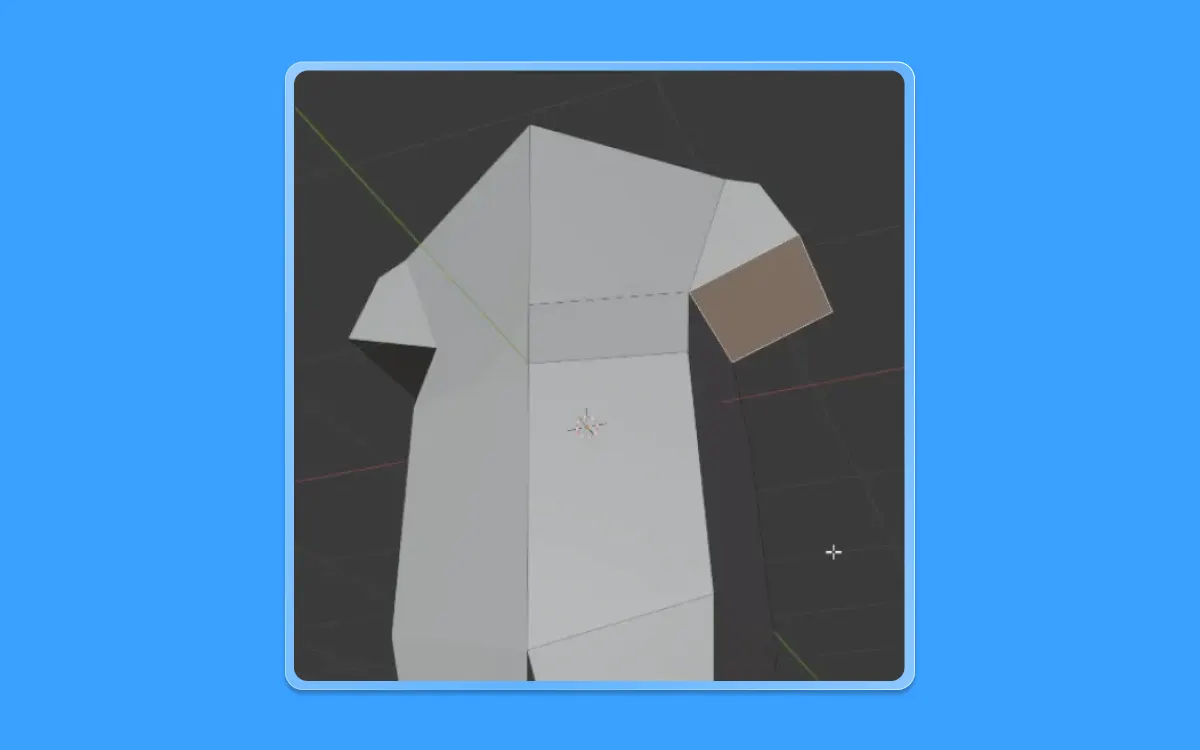
Now, let us once again go back to the upper body part of the human
- Once you have navigated there using the middle mouse button, select this particular face near the shoulder area by shifting to face selection mode
- To do that, press 3 on the number pad
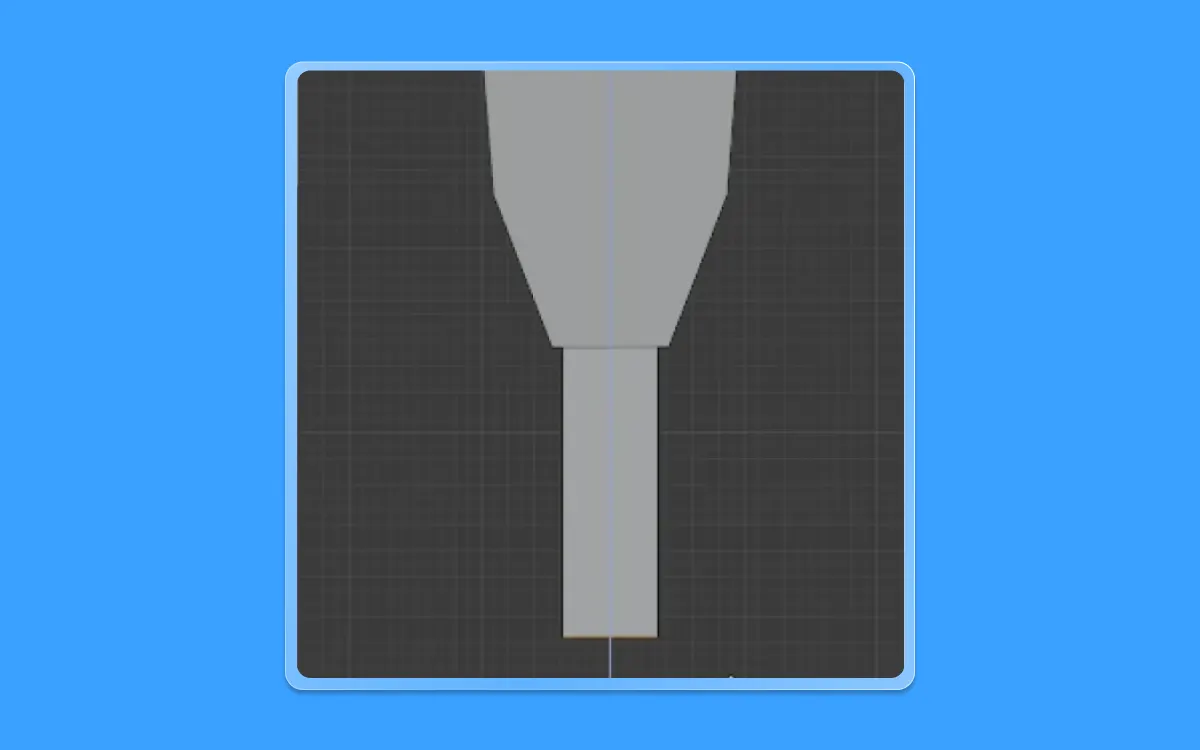
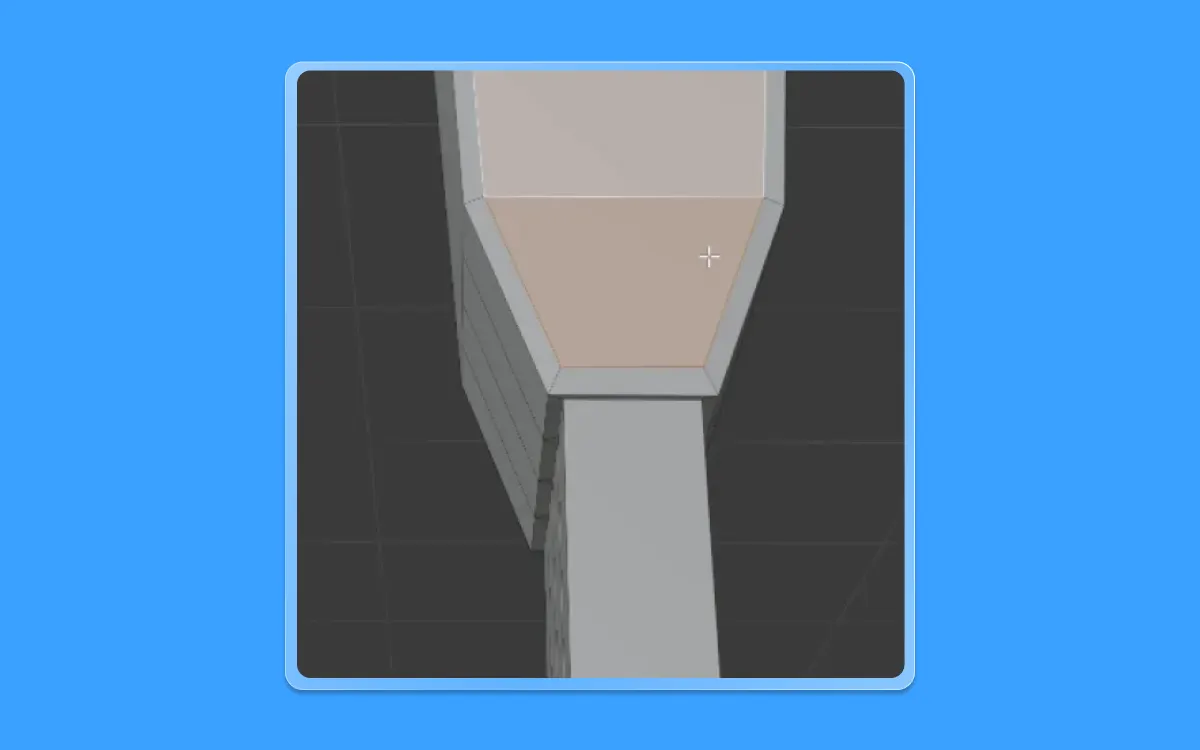
- Now press E(to extrude)+S(to scale) and scale the extrusion inside till you get the desired shape
- While having the same face selected, scale it along the X-axis by pressing S(to scale)+X(in the X-axis) to shrink it down the neck's diameter size
- Now, go back to the front view by pressing 1 on the keyboard
- The face is still selected. Rotate in the Y-axis by pressing R(to turn)+Y(in the Y-axis) until you get a horizontal neckline
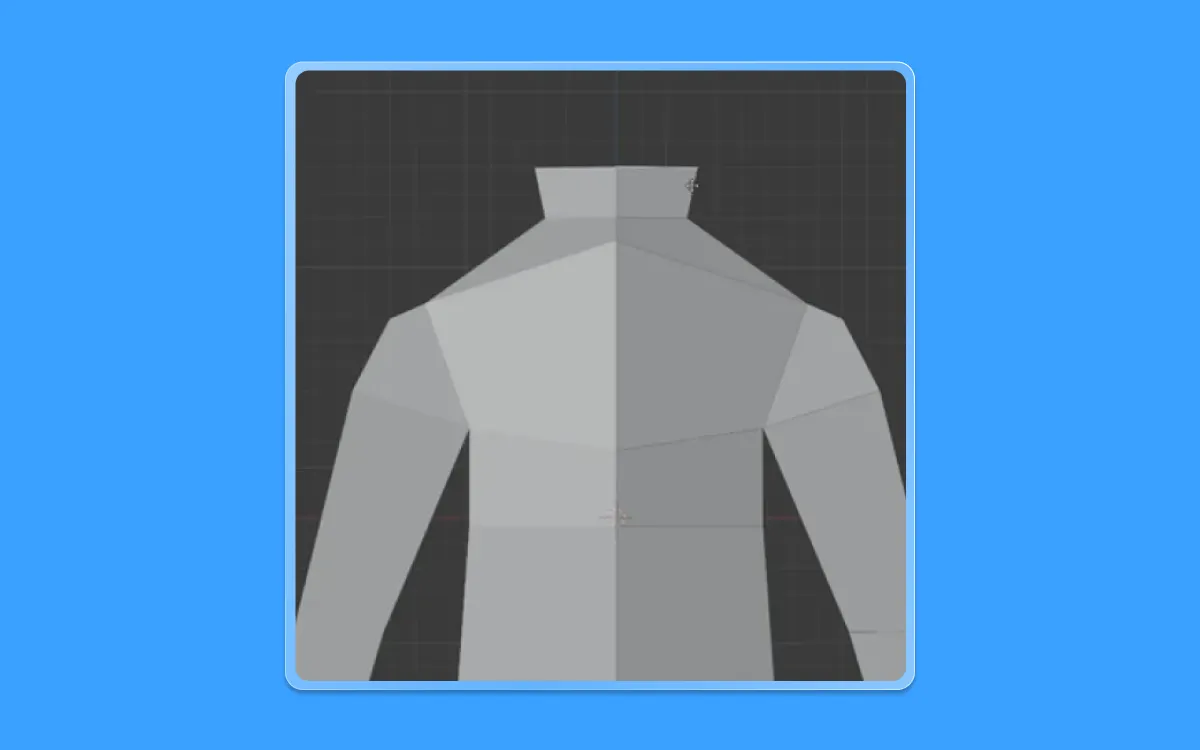
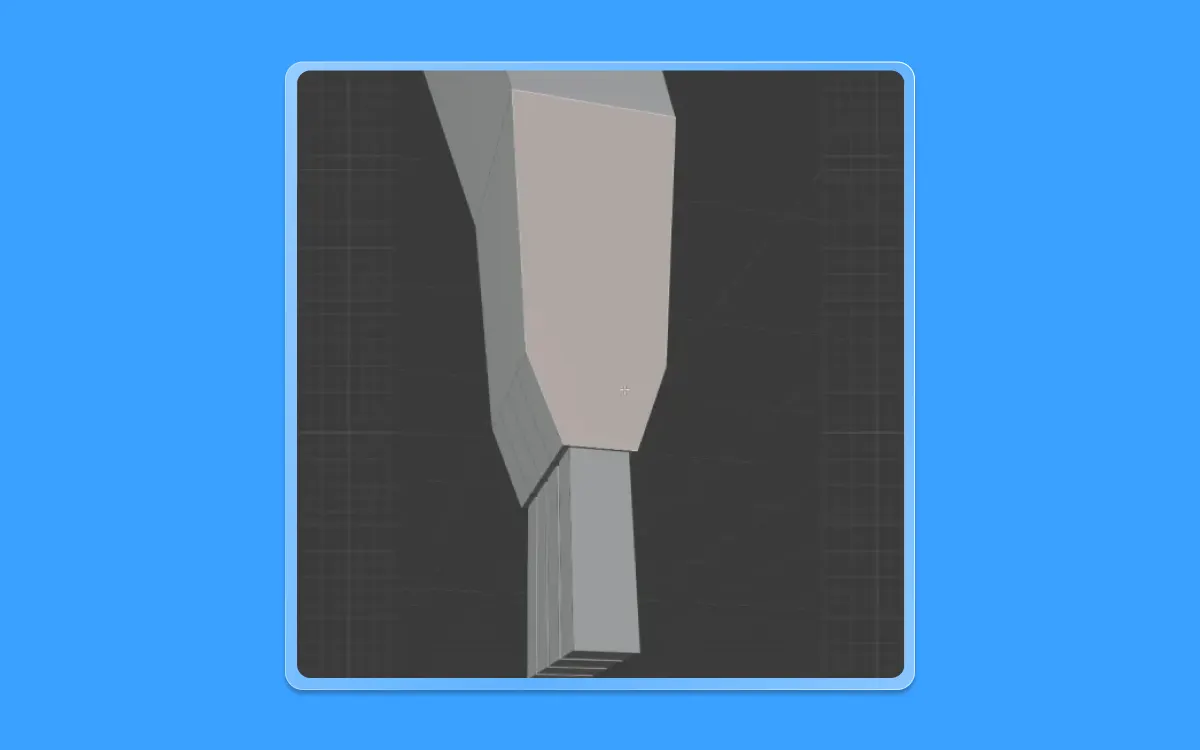
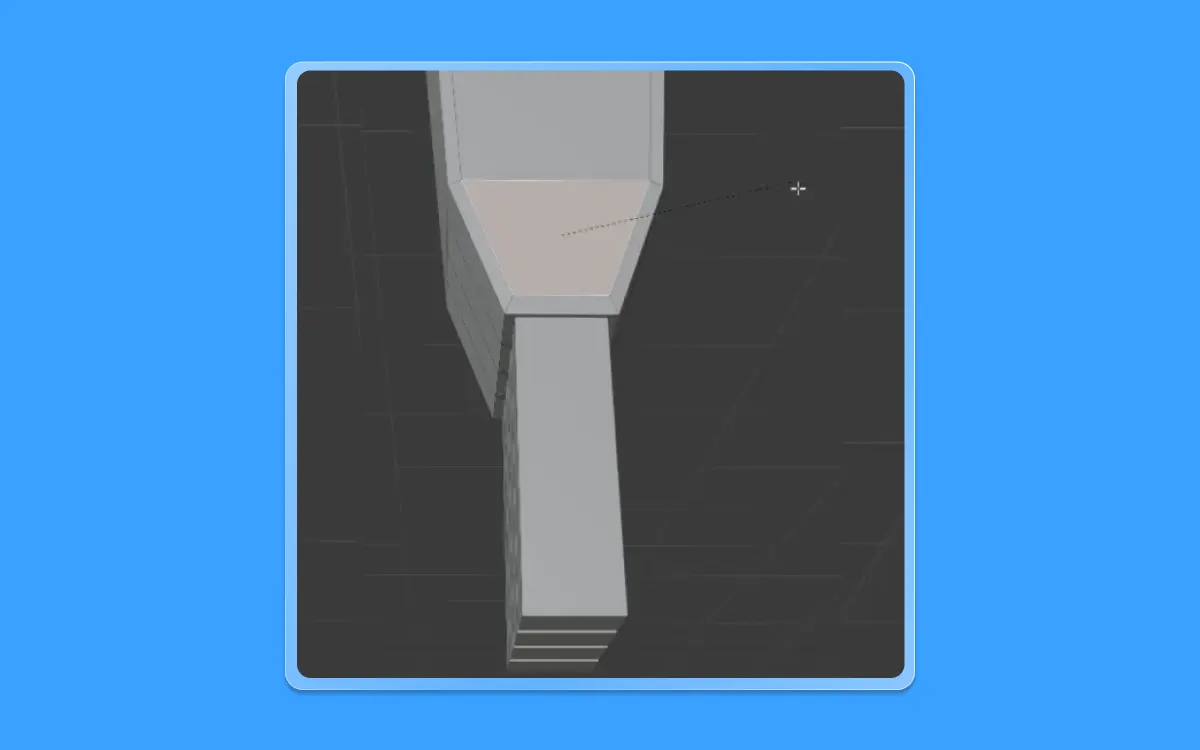
- Extrude the neck towards the top to create the neck
- Press E (to extrude) + Z( along the Z-axis) and drag the mouse and confirm it by pressing left-click on the mouse till you get a shape somewhat similar to this
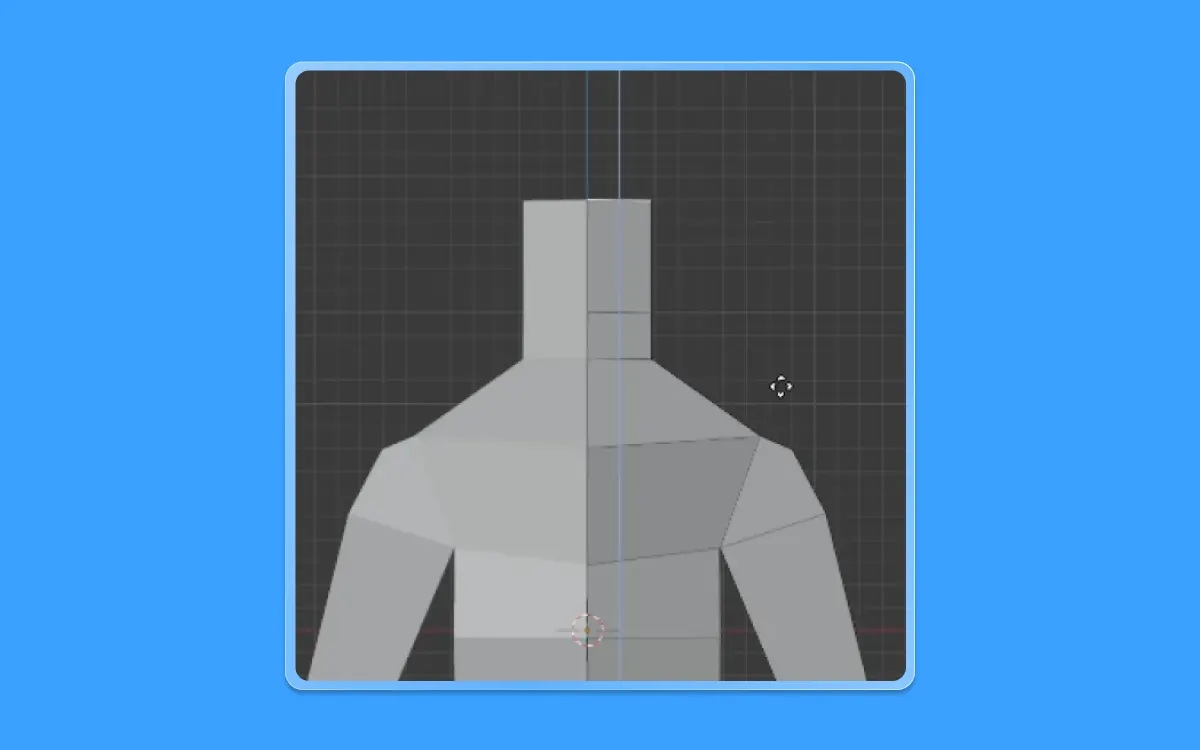
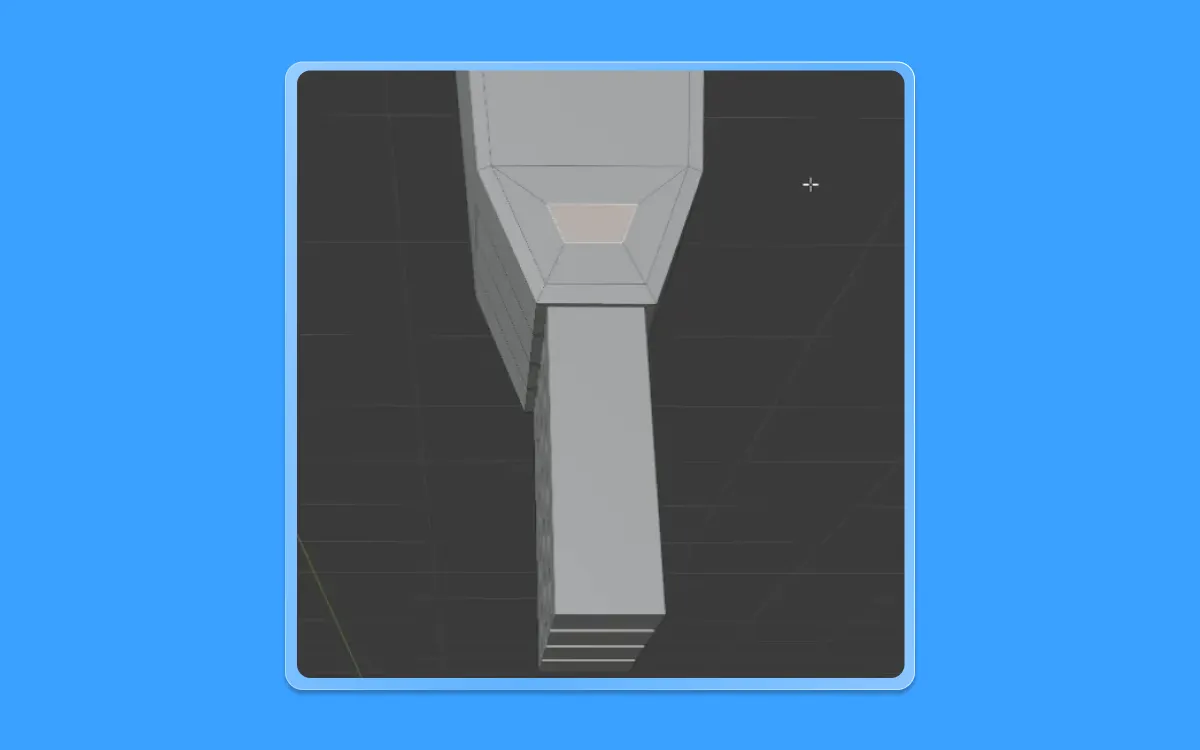
- Extrude the neck once again by pressing E(to extrude) + Z(on the Z-axis) to create the front portion of the face
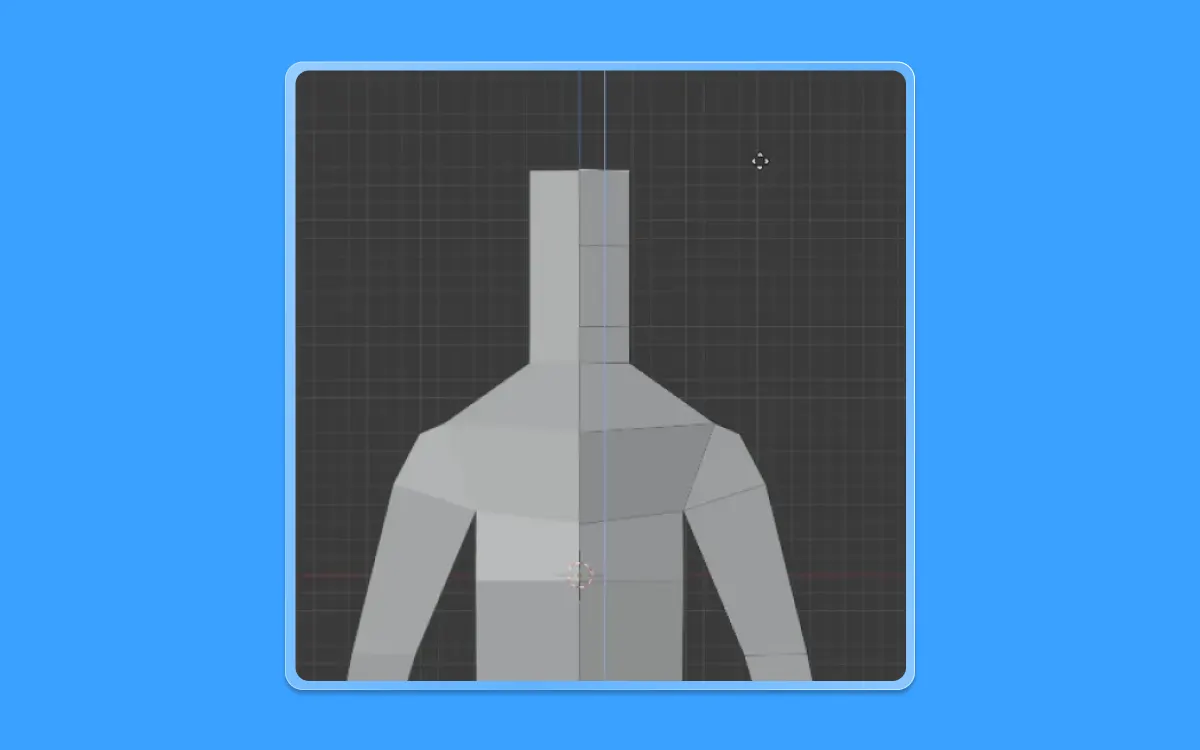
- Repeat it once again to achieve this form
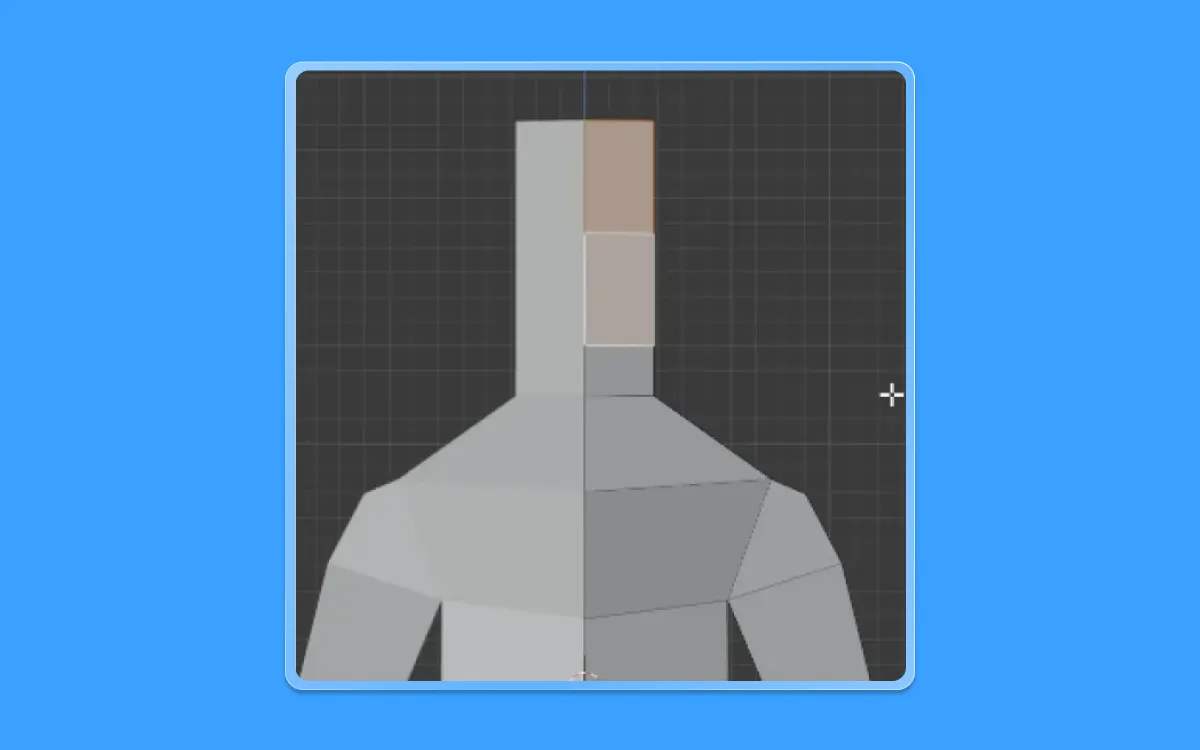
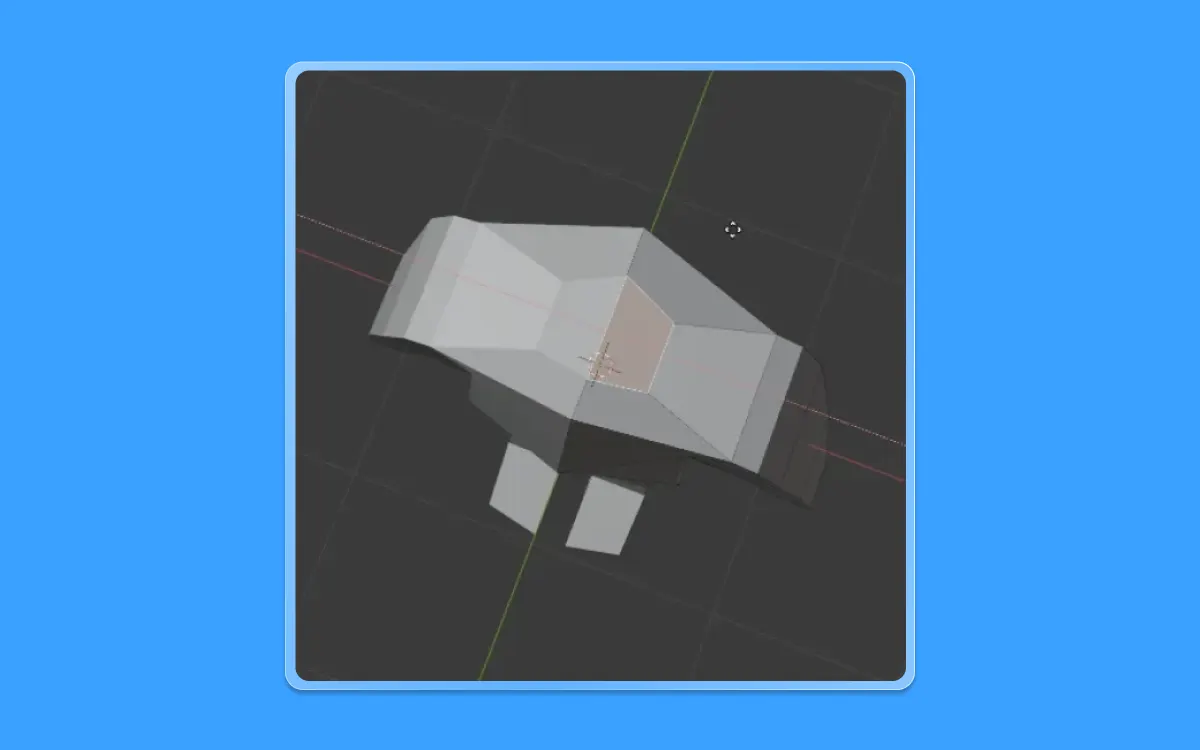
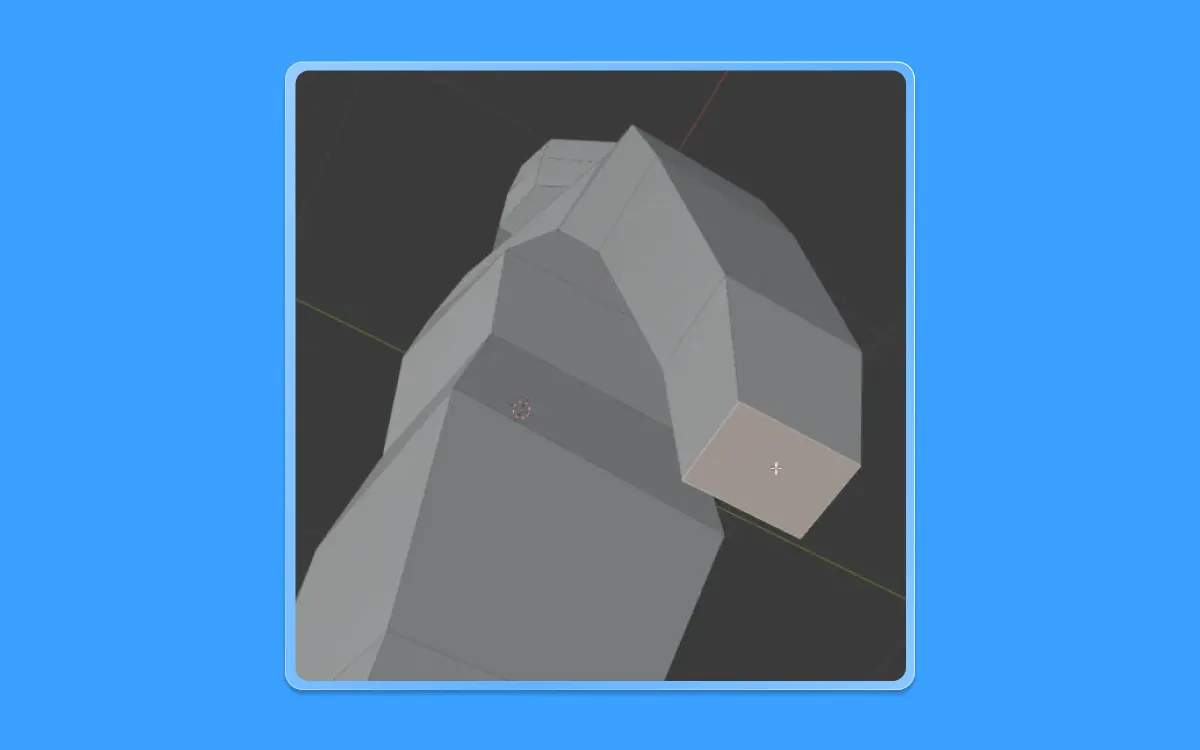
- Let's hop into the face selection mode by pressing 3 on the number pad. Next, select these two faces
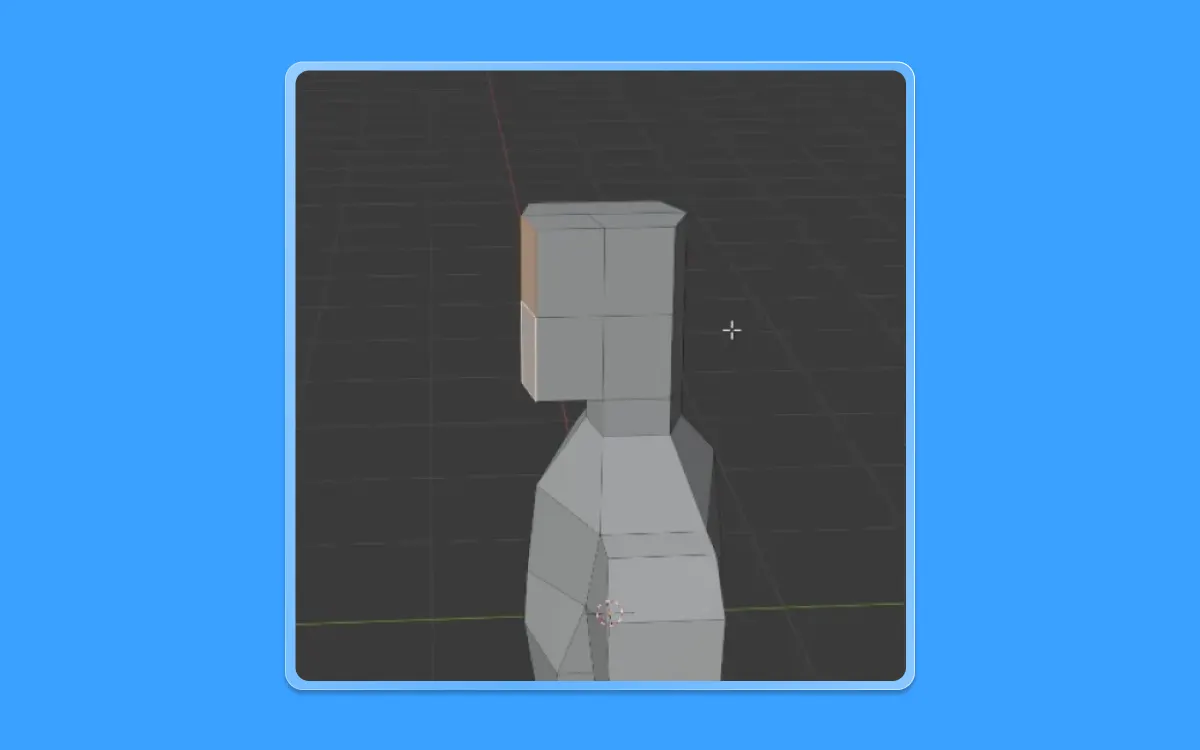
- Once the faces are selected, let us extrude them in the Y-axis by pressing E(to extrude)+Y(along the Y-axis) and by moving the mouse and clicking left click on your mouse till we get the desired shape
- Now we have the base for the head complete
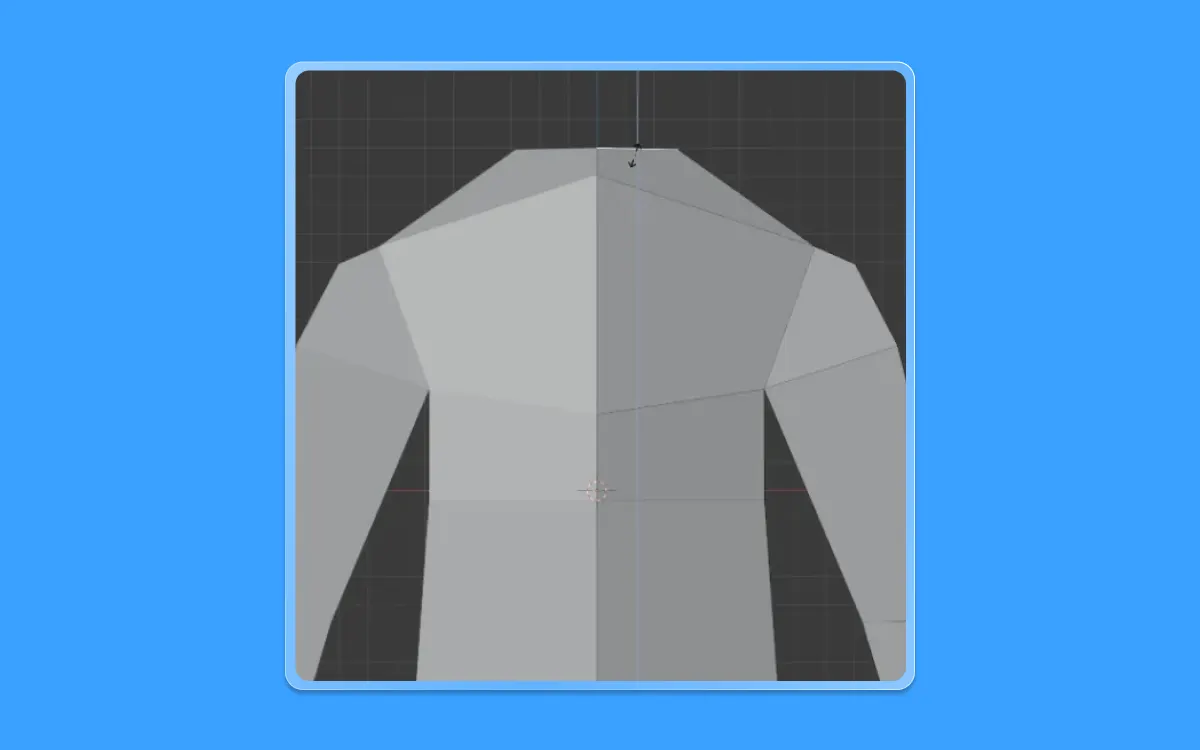
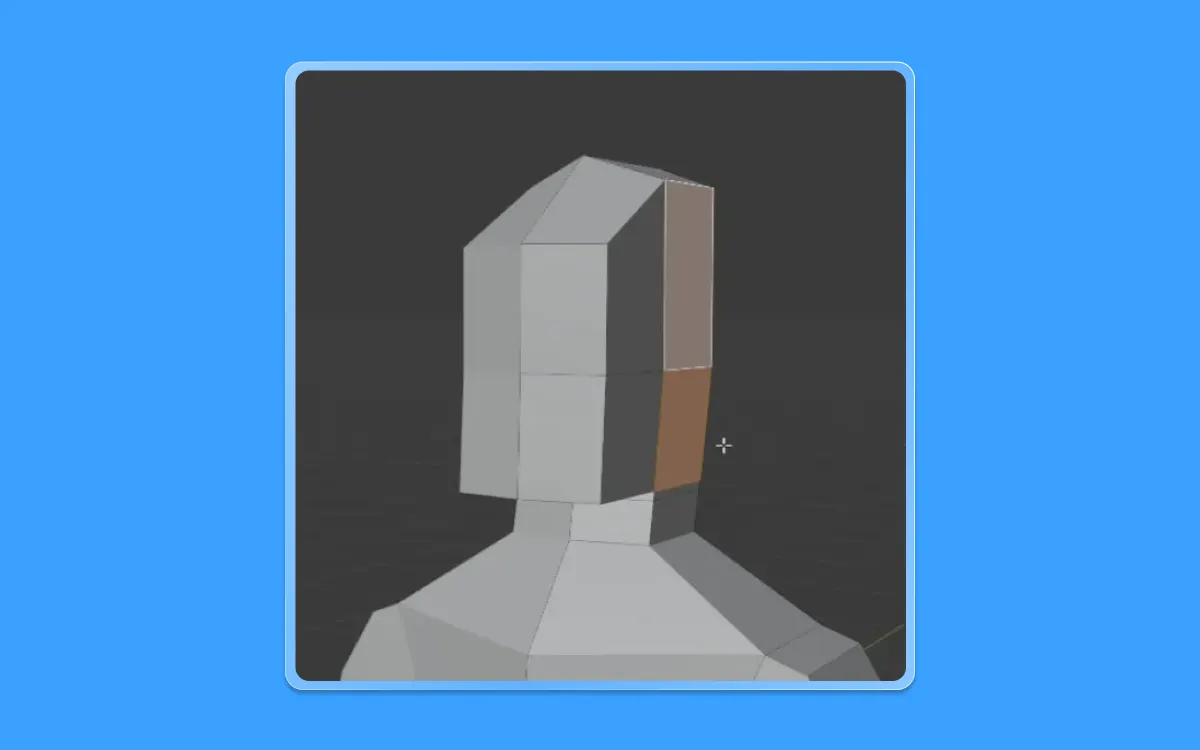
- Let us select these sides so we can give width to a human's head
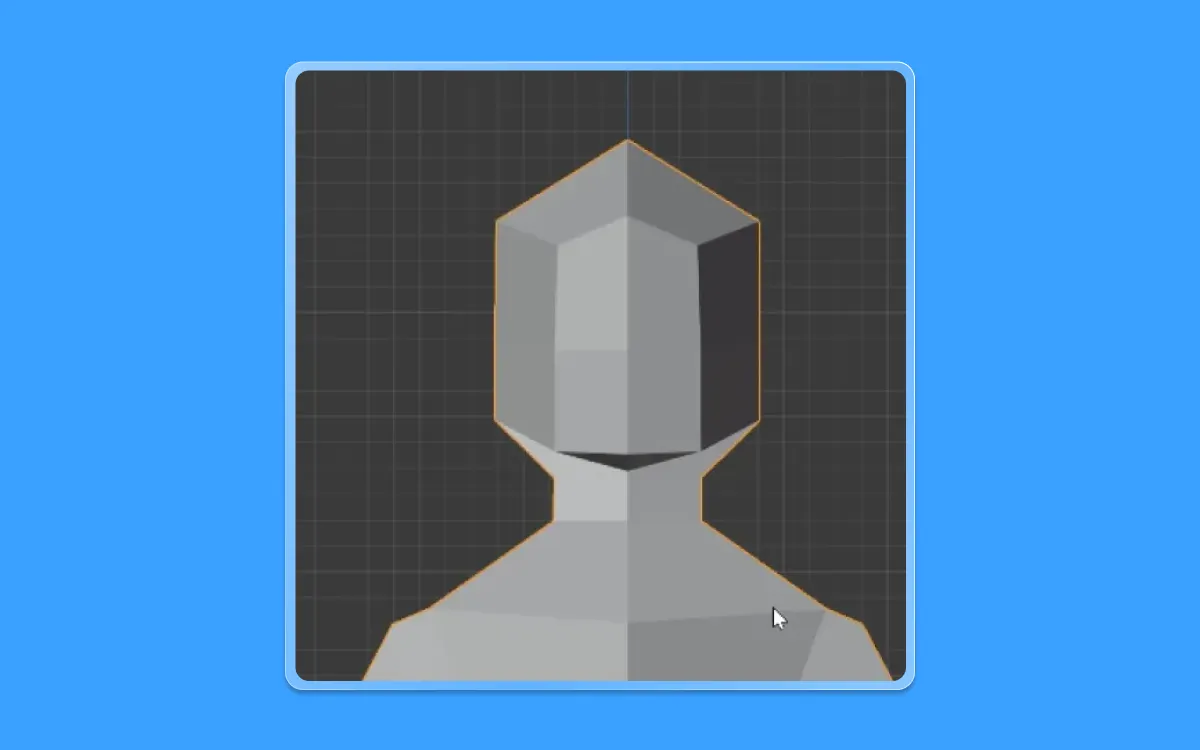
- Press G and move it in the X-Axis by pressing G(to move)+X(along the X-axis)
Our head is complete now!
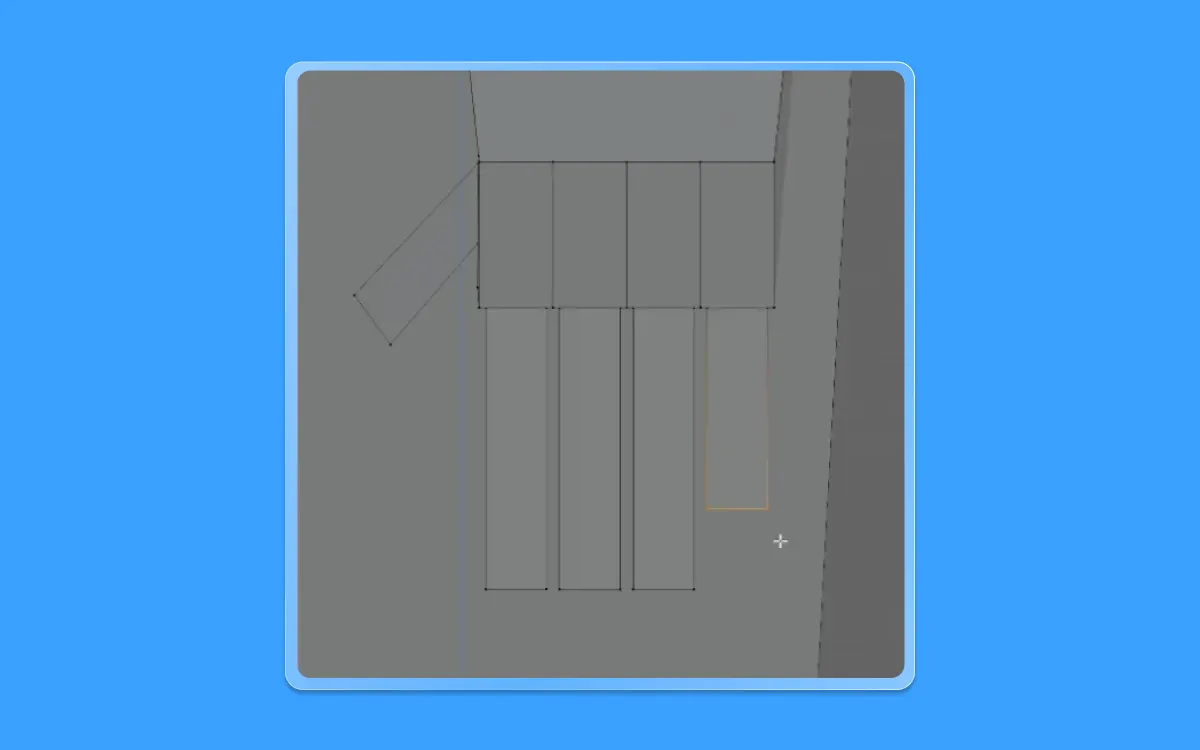
- Now let us start to create the fingers for our humans
- To do so, let us select the human's left hand and click on this end face of its hand
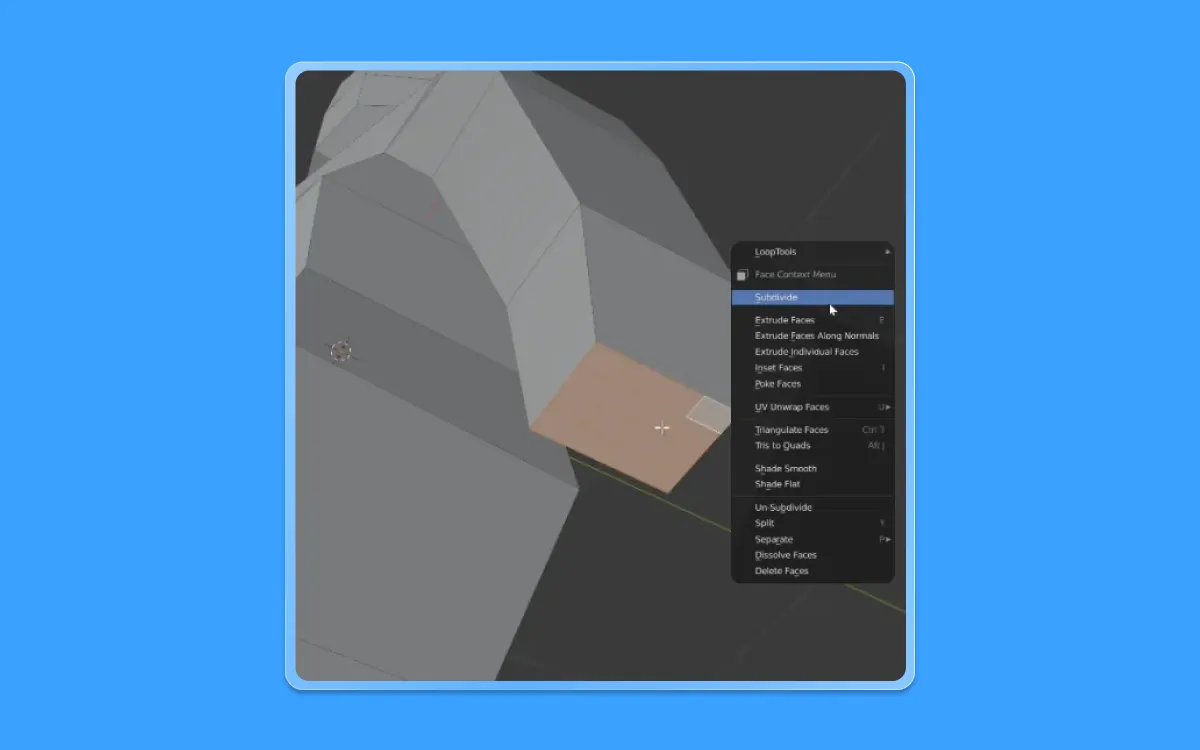
- Let us right-click on this face and select the "Subdivide" option
- Repeat that once again to get one more subdivision
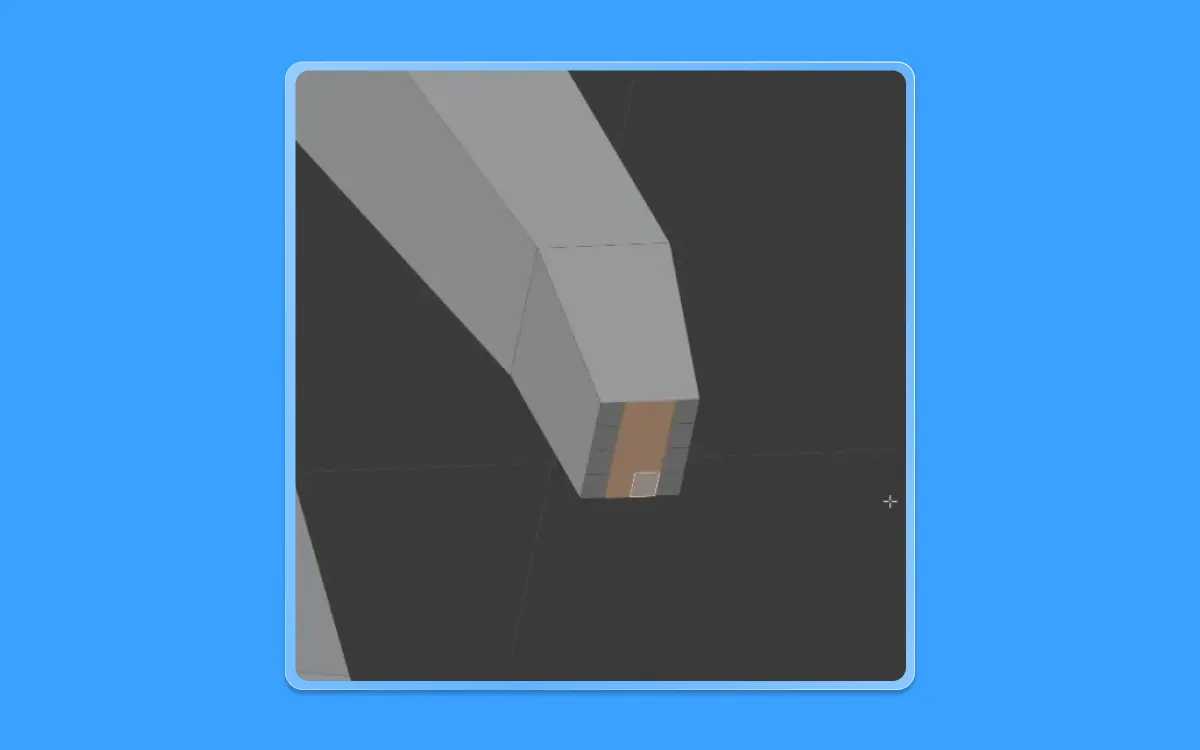
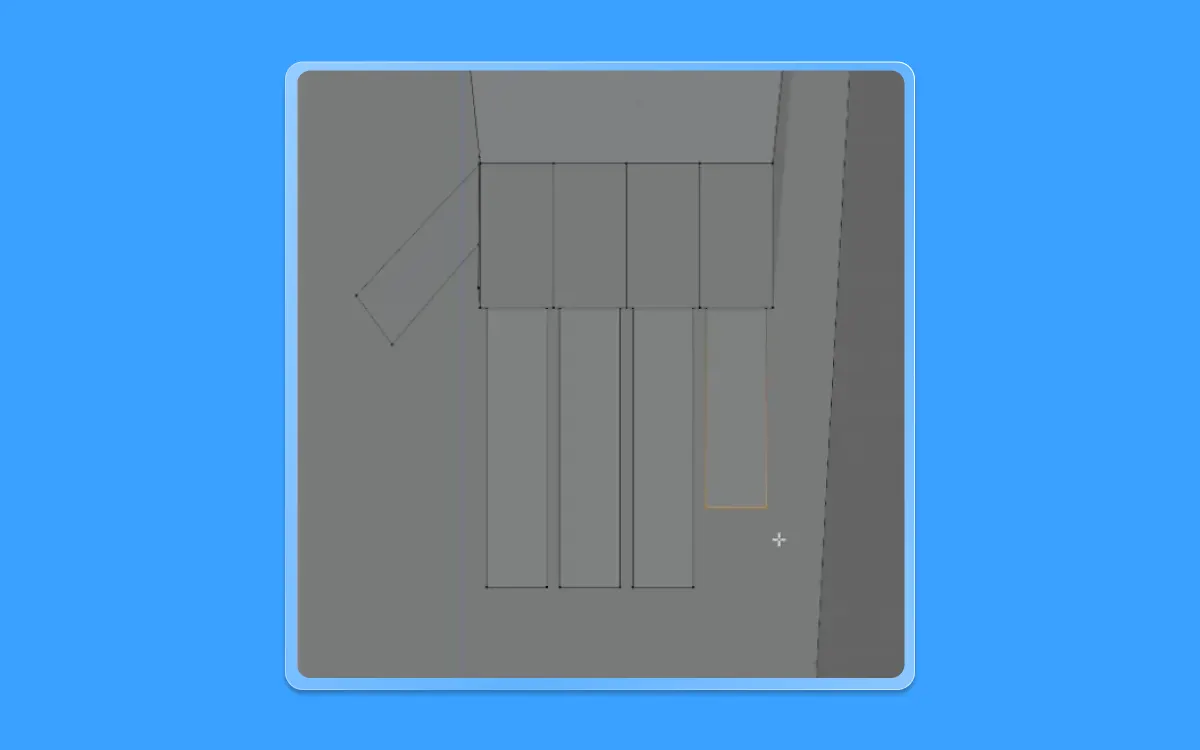
- Next, let us deselect everything by pressing elsewhere on the viewport and selecting these particular faces, as shown below
- Now let's enter the front view mode by pressing one on the number pad
- Pull down these vertices below by pressing G(to move)+Z(on the Z-axis), drag the mouse down below, and click left click with the mouse until you get a shape

- Select this edge by pressing 2 on the numerical array and selecting it using your left click on the mouse
- Dissolve this Line by pressing Ctrl+X
- Go back into face selection mode by pressing number 3 on the numerical array
- Now let us select these faces as shown below
- Once selected, let us inset all these individual faces
- To do so, let us press the Inset Key (I) twice and press the left click to confirm the inset
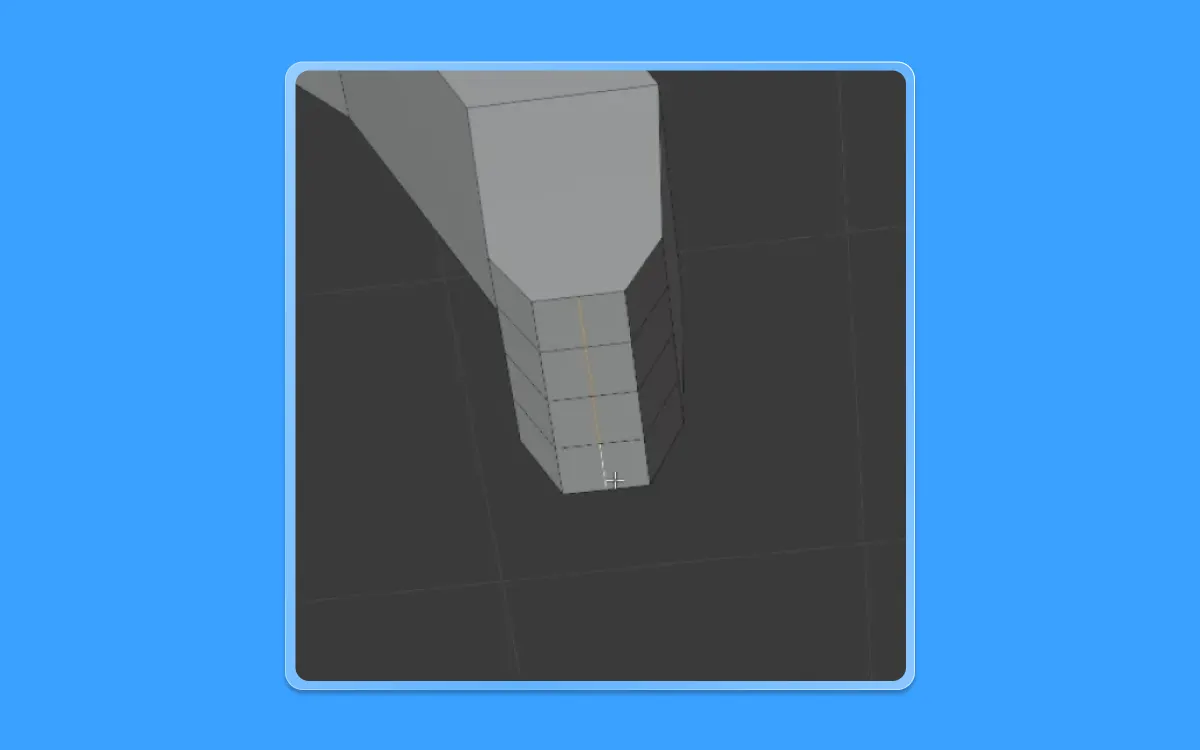
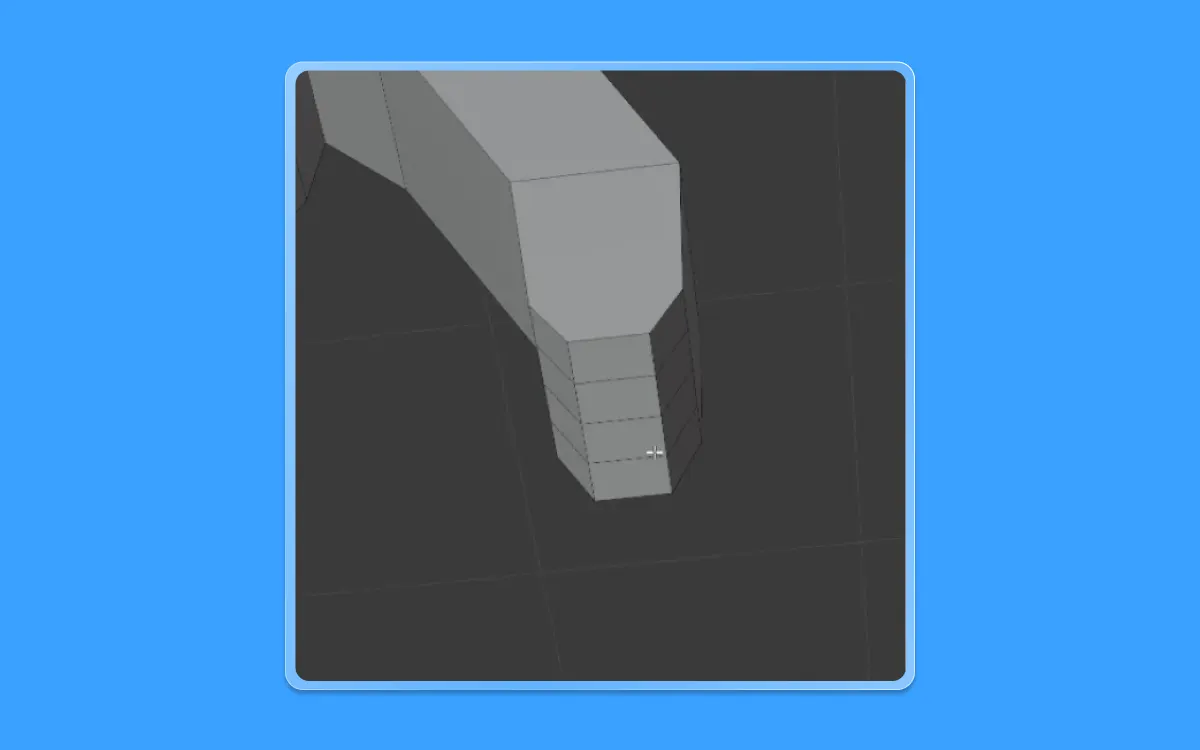
Now let us extrude this down below to create the fingers.
- To do so, let us press E(to extrude)+Z(on the Z-axis) down below by dragging the mouse and clicking left-click to confirm the selection
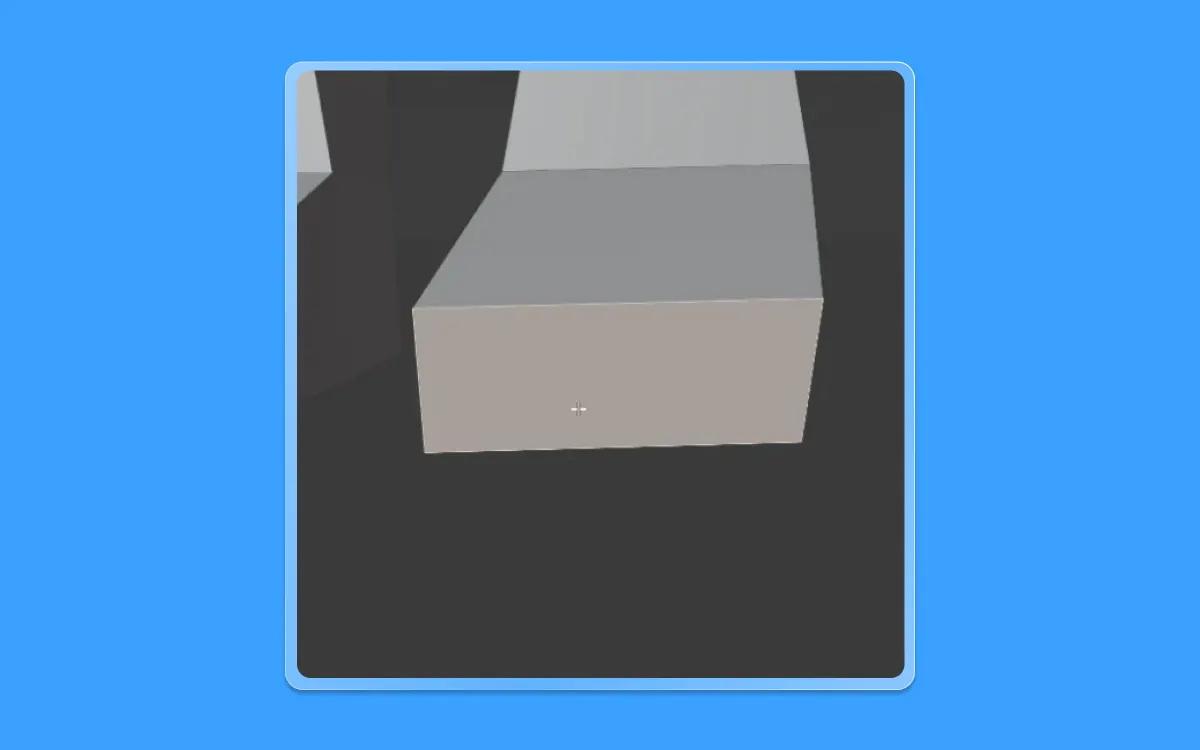
- Next, let us select this new face to create the area for the thumb

- Inset this face by pressing I(top inset) and clicking left click on the mouse to confirm the selection
- Use the Knife tool (K) and make an incision
- Select this new face
- Inset this face as well by pressing I (top inset) till you get a shape
- Next, let us extrude the part of the thumb
- Press E(to extrude) and pull in towards the Y-axis by pressing Y
- Let us angle it in a way a normal thumb would be
- To do so, let us move it by pressing G
- Next, let us adjust the height of the fingers by going into vertex selection mode by pressing 1 on the numerical array and changing it manually by pressing G
Now we have our fingers ready. Let's move onto the toes.
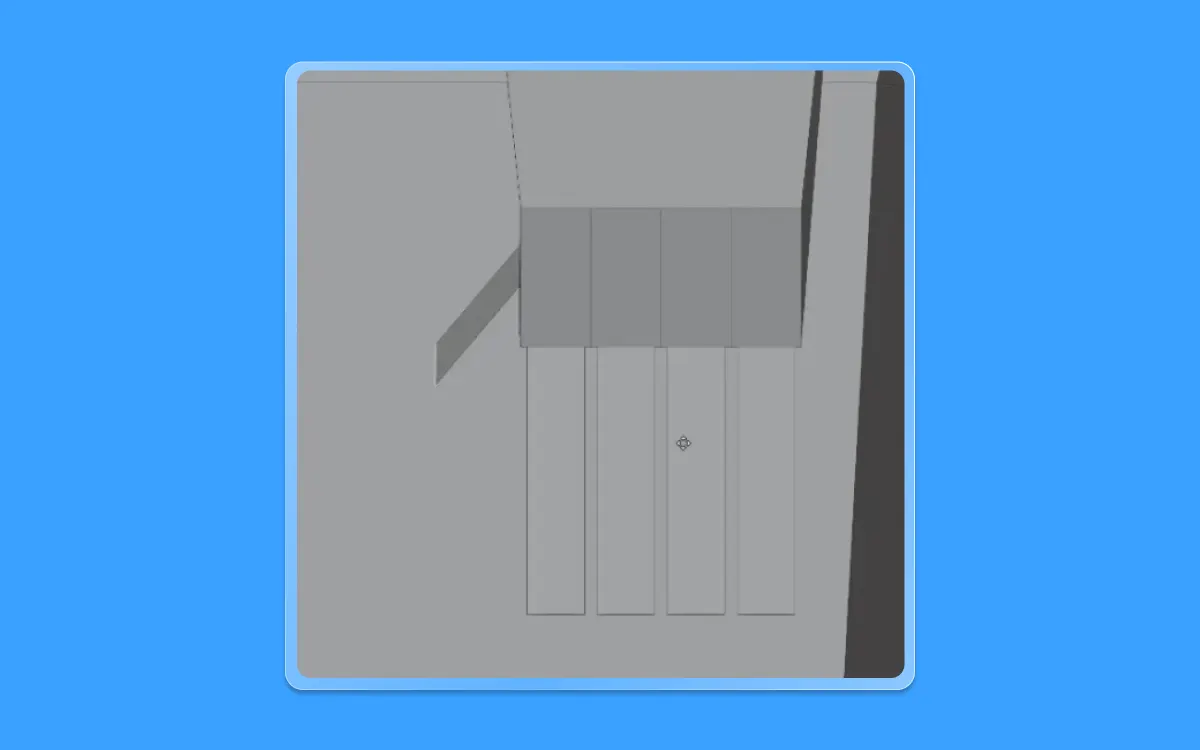
- Once in the face selection mode, select this face of the feet
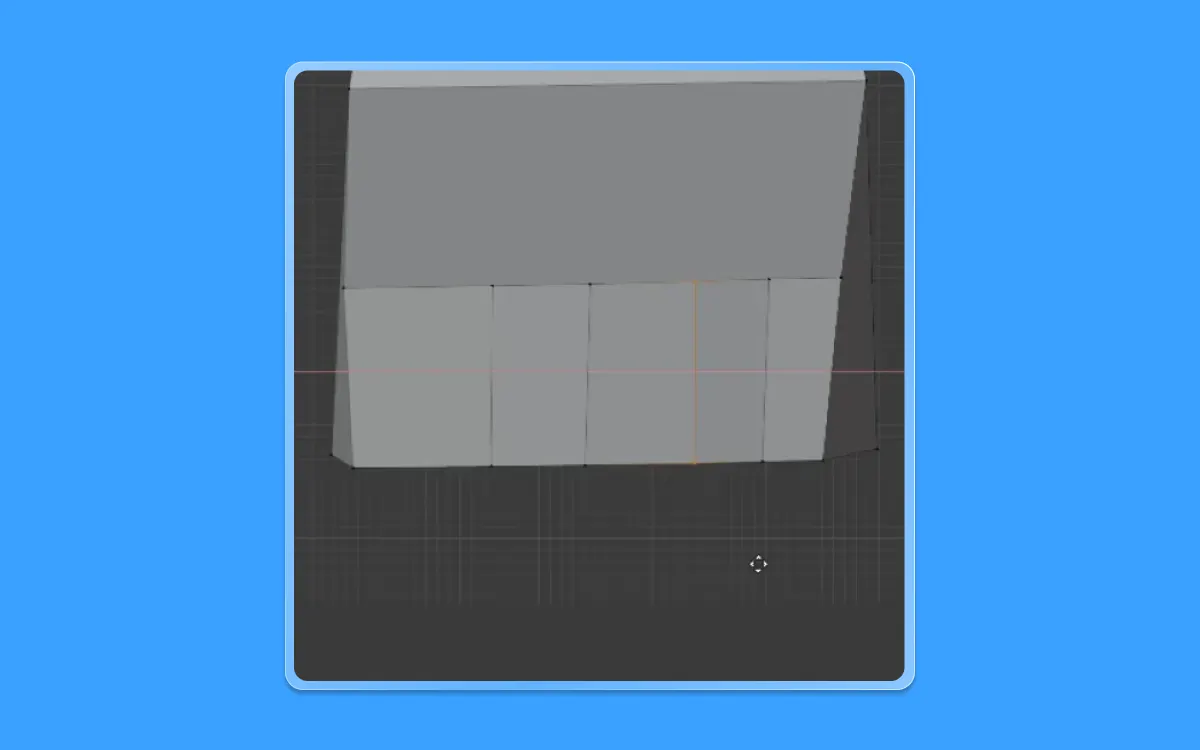
- Using the knife tool (K), let us mark the incisions for the toes. Which will be four vertical lines
- Next, let us do the same method we did for our fingers
- Select the entire five faces. And press I twice(to inset individual faces)
Next, let us extrude so that we get our toes.

- Press E(to extrude) along the Y-axis
- Let us do the final step. Which is subdividing our Mesh
- Press Ctrl+1 on the number pad
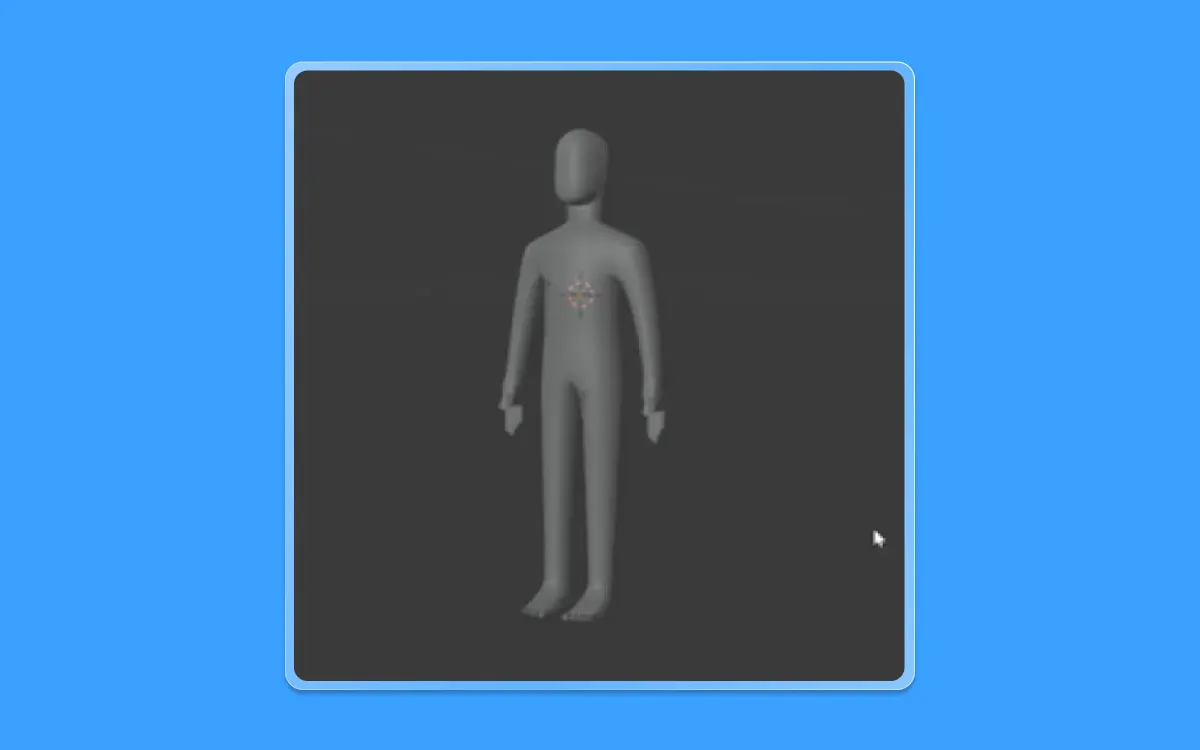
- And we get a humanoid result like this
Step 5: Add Background
Let us add a background.
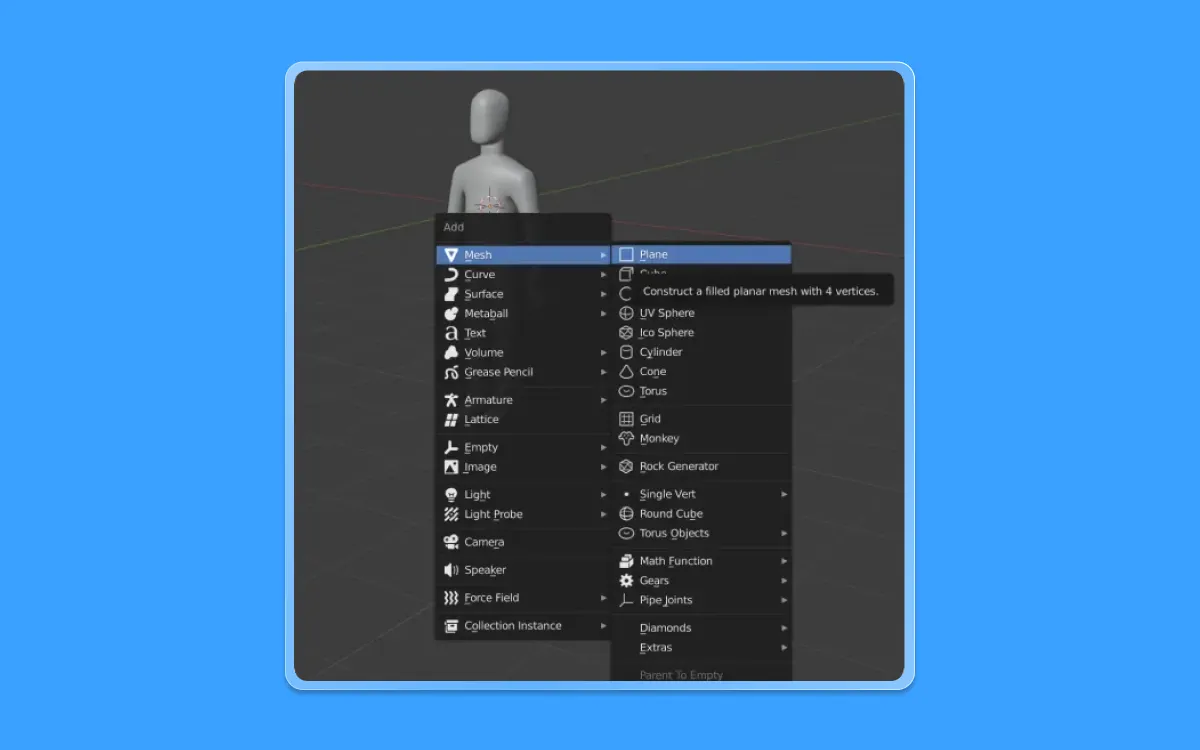
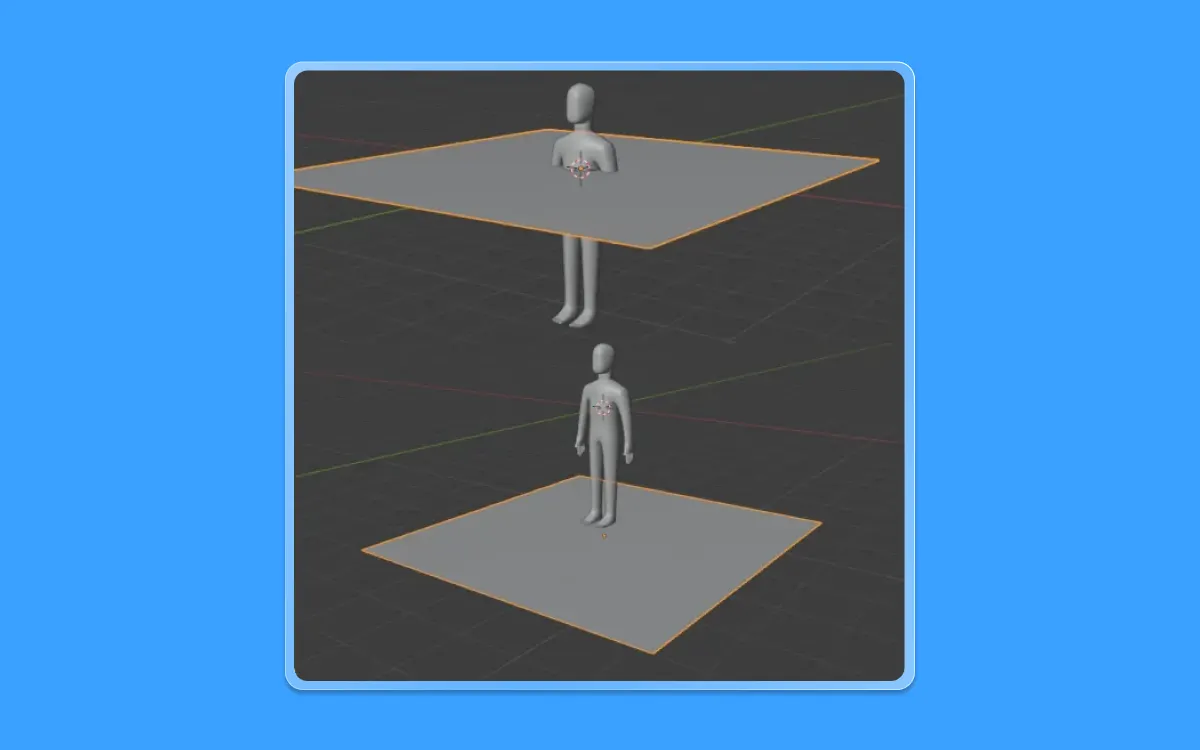
- To do so, let us press Shift+A. In the Menu that appears, let us go to Mesh>Plane and select left click
- Scale this plane by pressing S+5
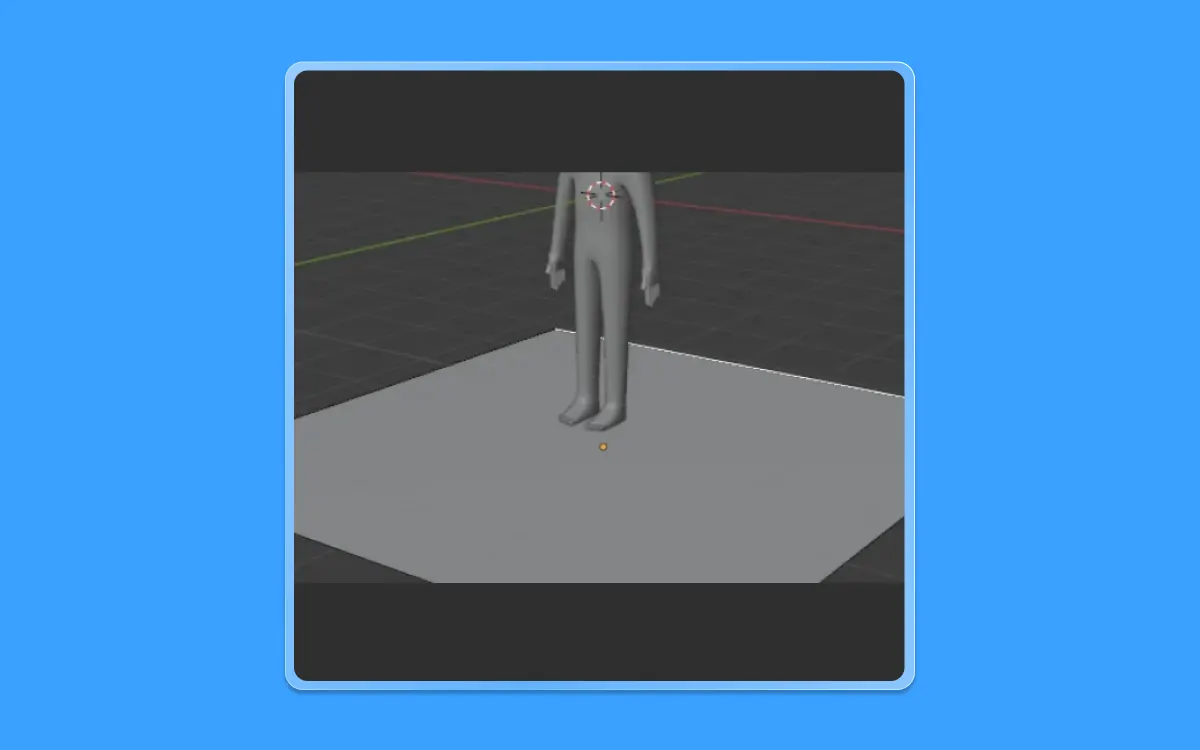
- Now let us bring this down by pressing G(to move)+Z(On the Z-axis)
- Go into edit mode by pressing "Tab" and select the northern edge of the plane
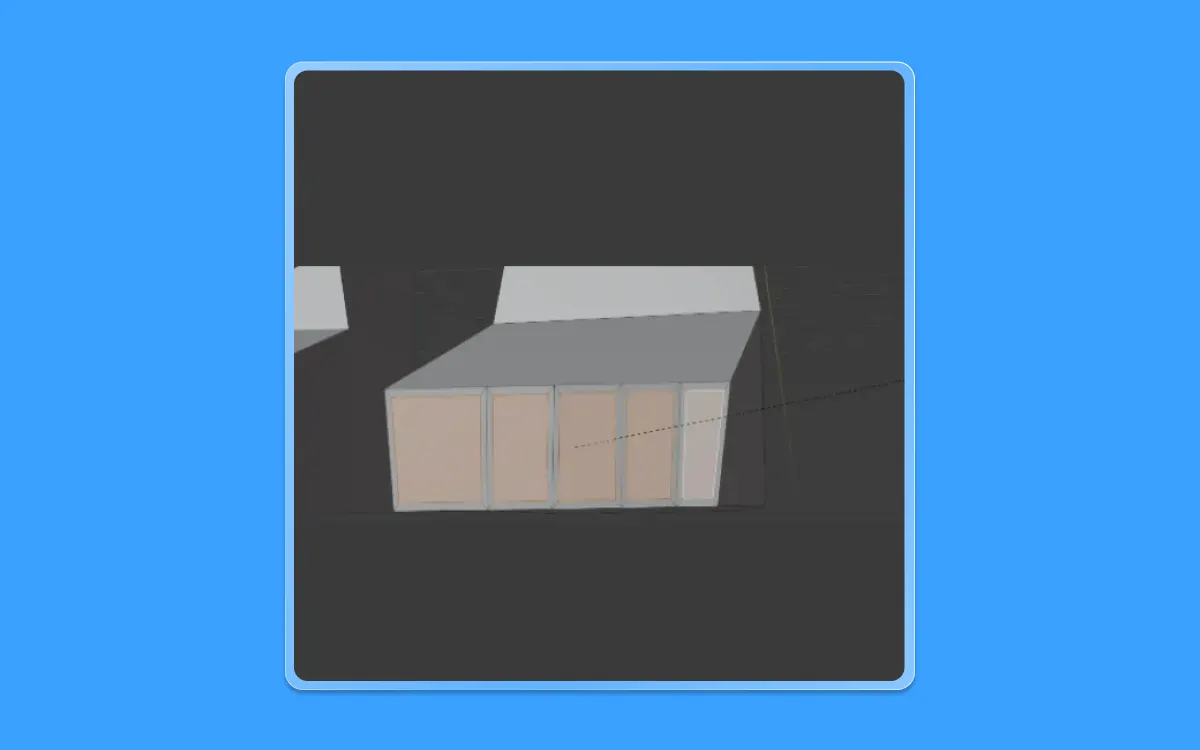
- Press E(to extrude)+Z(on the Z-axis) to extrude the edge towards the top
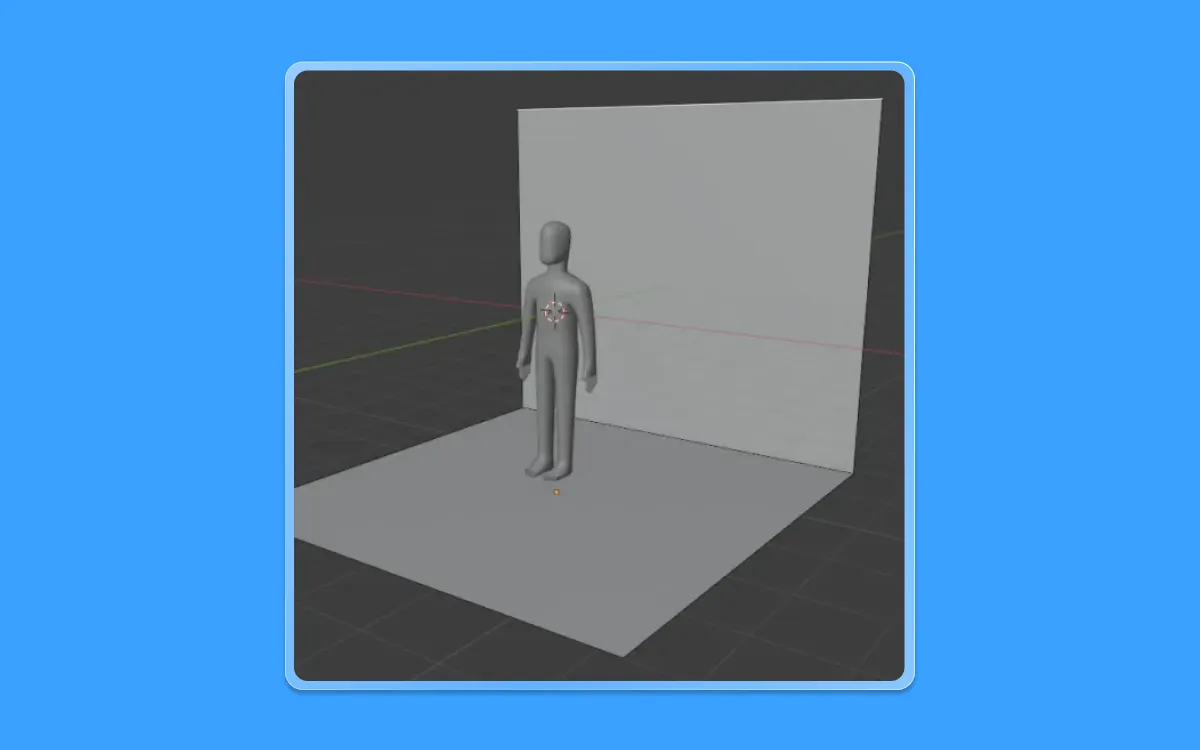
- We have our background ready for the human
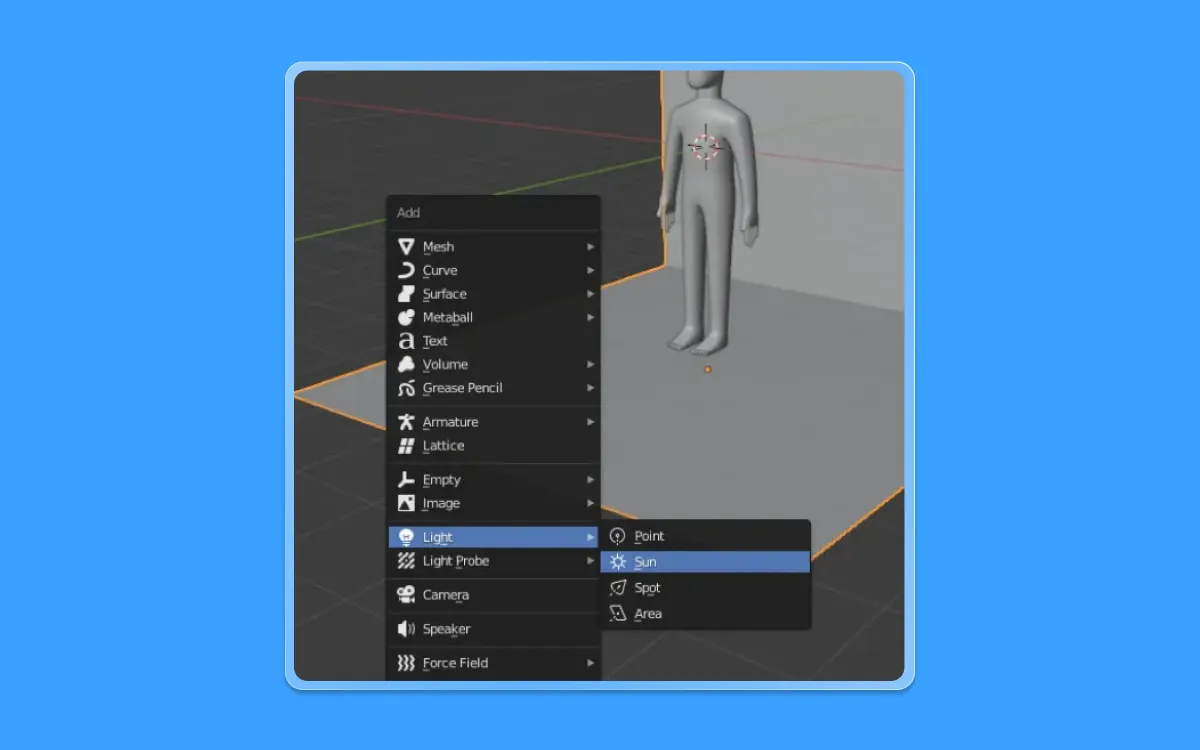
- Next, let us add lights
- To do so, let us press Shift+A and select "Sun" from Lights
- To frame the camera. Press Ctrl+Alt+0 at any angle. And hit F12 to start the render
- Once the rendering is over. You will get a result like so
Voila! Our human is complete. You have successfully created a 3D character of your own.
We hope you had fun and learnt a lot with this tutorial. If you have faced any diffucilties or have any suggestions, please drop a comment below! We would love to hear from you.
Visit Iconscout and make the most of our expansive library with 3.2M+ assets - Curated SVGs, Vector Icons, Illustrations, 3D graphics, and Lottie Animations.
Want to share your suggestions or become a part of the community? Write to us on our Community Forum on Discord.
Until then, happy designing!
Share on


Related Blogs

Access the world's largest Design Ecosystem: Assets, Integrations, and Motion.